
iOS app usage - General functions
Some Images and descriptions might varry to the current release due to updates of the application over time. The general usage however should be similar.
General functions
Each mobile device can connect and sync to your cloud data by means of logging in with your CORTEX Service credentials - linked to your CORTEX Service instance/tenant. You can have an unlimited amount of mobile devices active. Let's take a look at the layout of the CORTEX Service iOS App so you know where to find which function or detail.
For best performance with mobile devices make sure you have optimal cellular connection or an additional GPS receiver. Have a look at How-to get good positioning accuracy for ALIS (iPhone and iPad) . This ensures that minimal user input is needed for identifying the right asset by use of the auto-selection tool and thus registering maintenance data onto it.
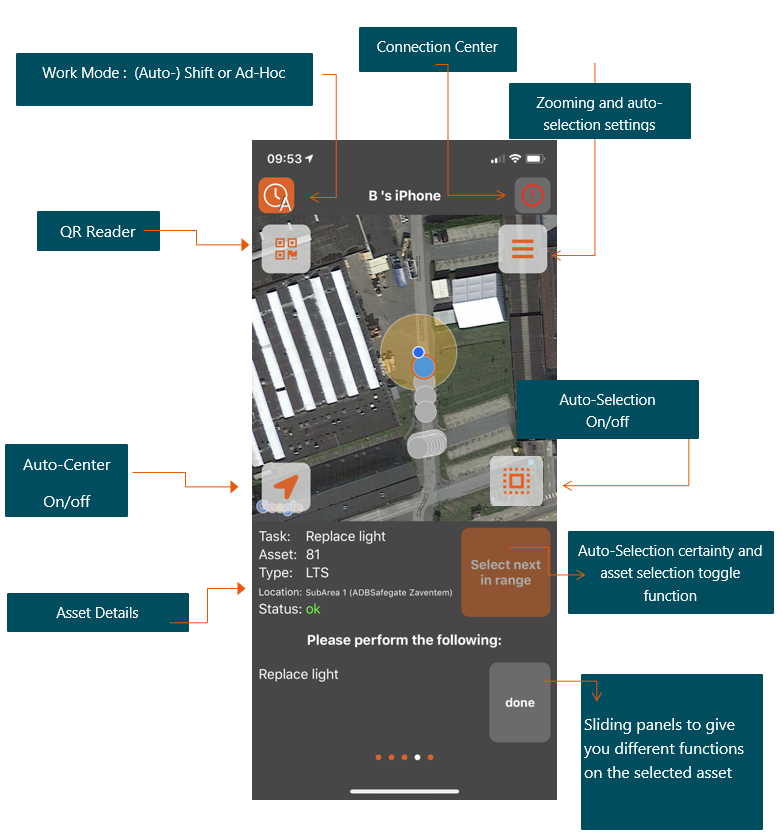
Status Bar
The top part of the app displays the current status of the app.
The left button indicates the condition of the working mode and the right show the status of the Connection Center. The text in the middle is the name of the iPhone device.
These are the different conditions possible for the Working Mode.
 | Workorder MODE |
 | AD-HOC MODE |
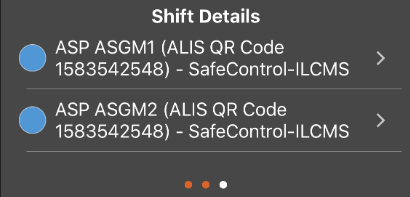
Workorder selection
Upon pressing the Workorder button the overview of available workorders will show, categorised per asigned Team. Select the workorder you want to work on.
.png?inst-v=a739c133-fc4a-4119-ab62-875ae2b24309)
Connection center
These are the different conditions of the Connection Center status
 | DEVICE ALARM |
 | SYNCHRONISED |
 | OFF-LINE MODE |
 | SYNCHRONIZATION IN PROGRESS The device is synchronizing its data. This should only take a few seconds and will result in one of the statuses above. |
Sliding Panels
The bottom part of the app is build up out of different Panels that can slide to left or right which brings you more information concerning the Workorder /task or asset . The panels shown depends on the Mode you are in.
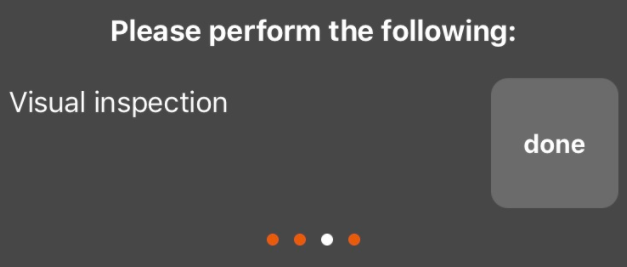
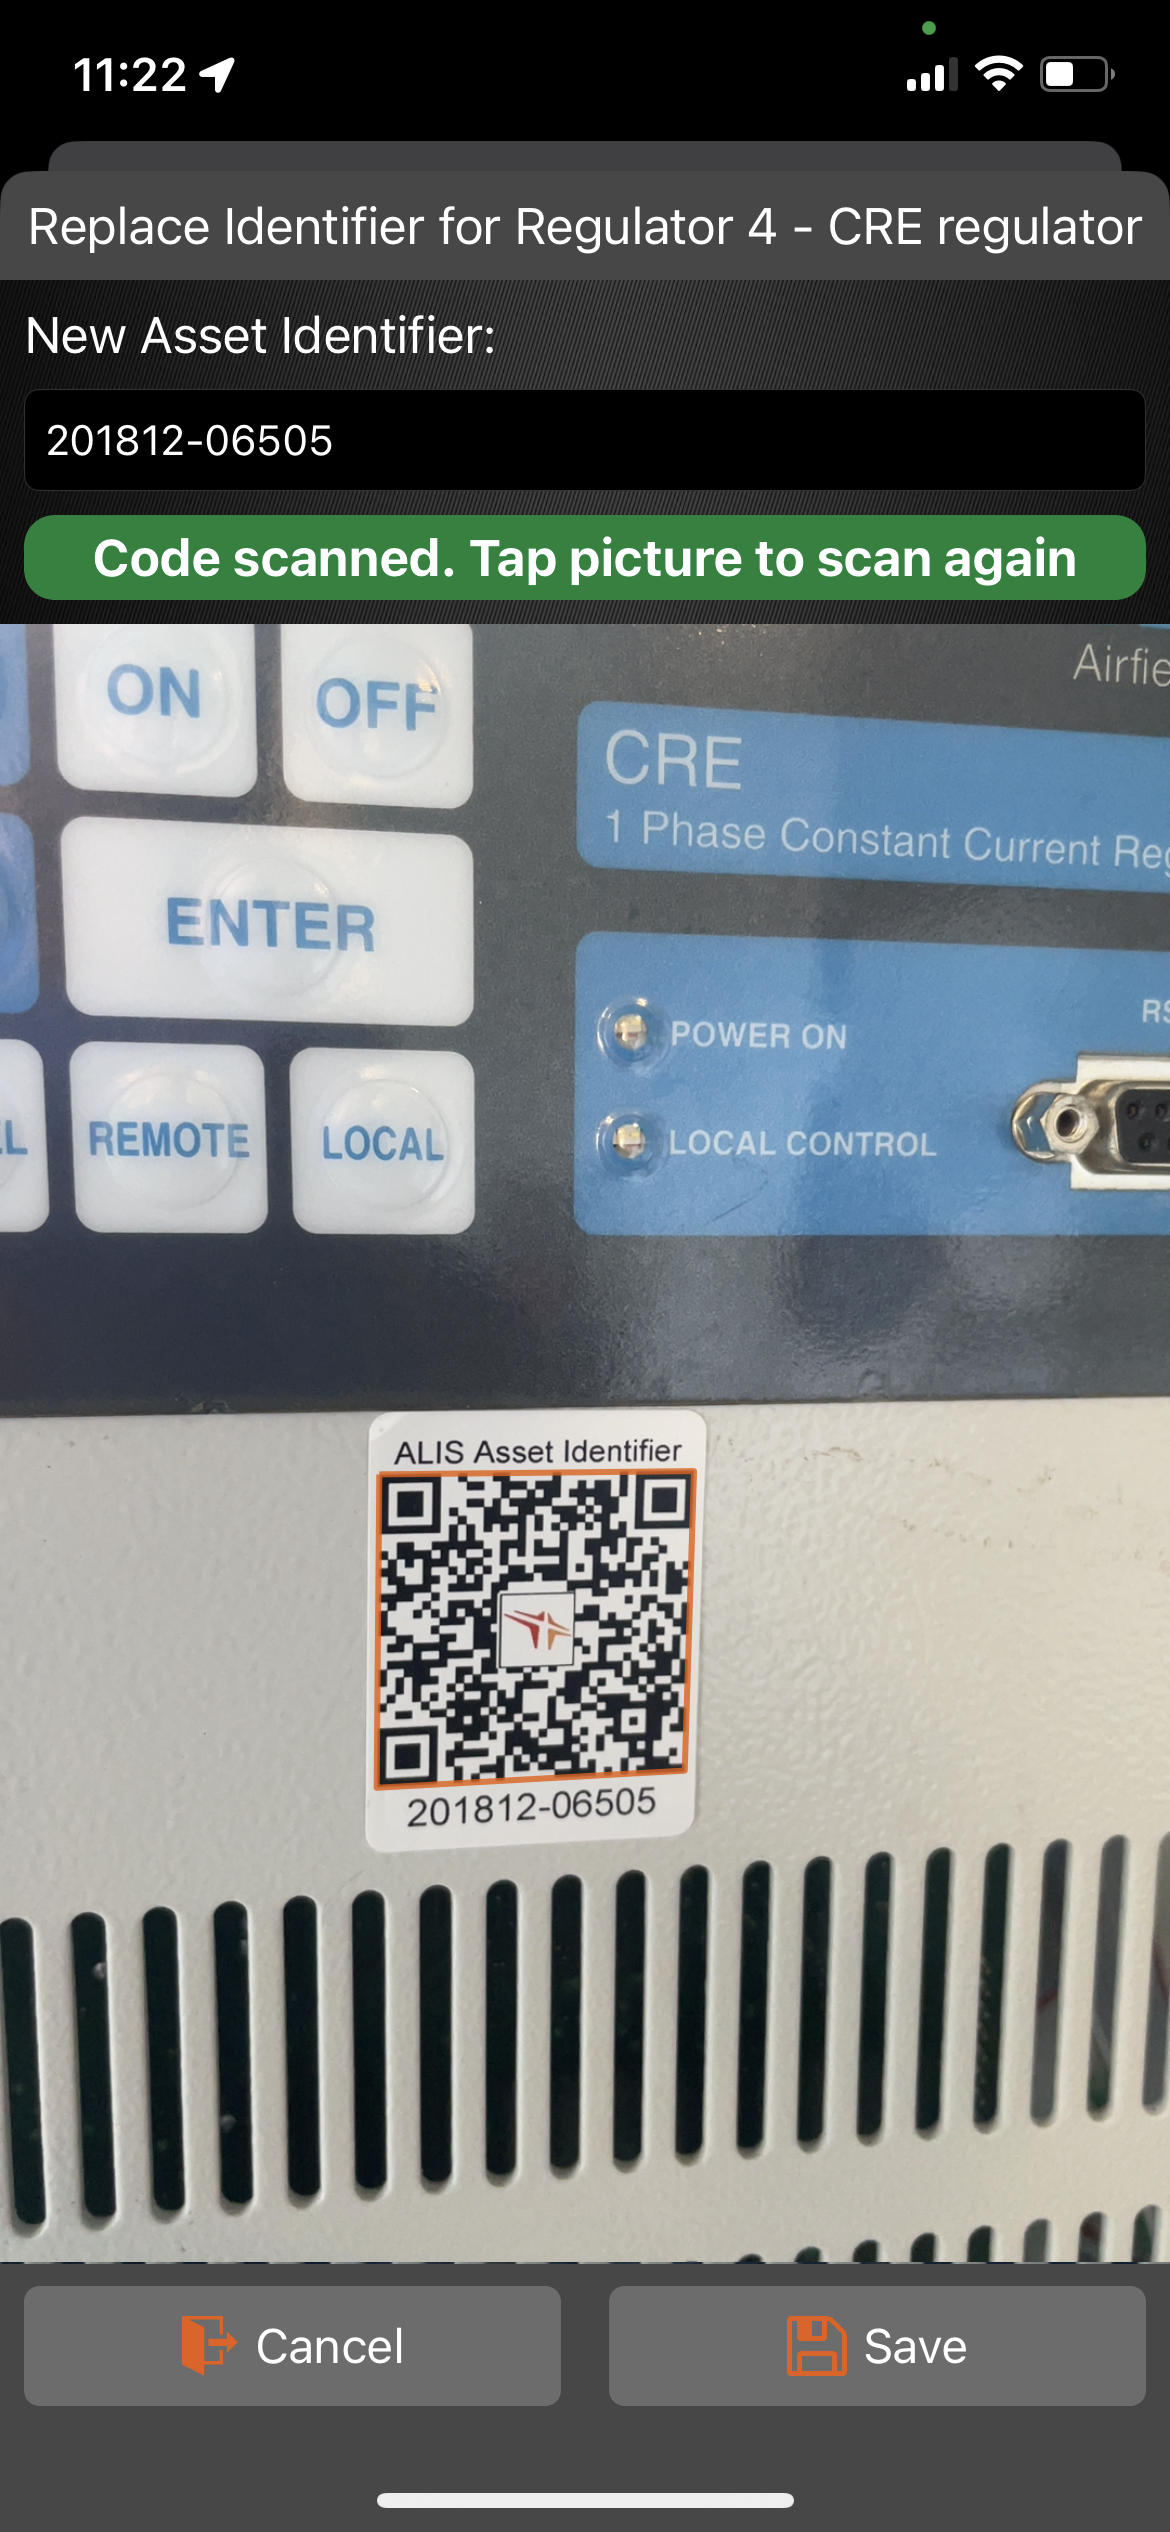
Inspection / Mark as Faulty - Replace (QR) identifier | Workorder Details |
|---|---|
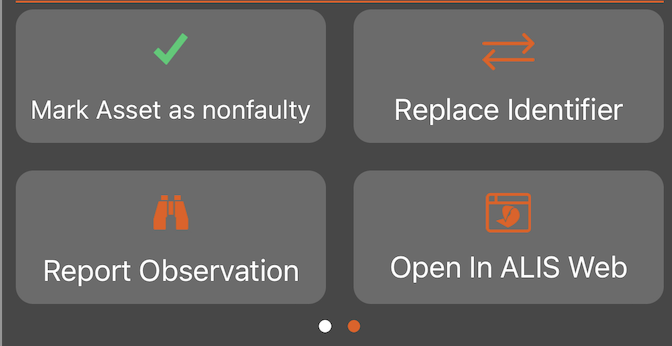 |  |
Allows for marking an asset as "Faulty". Other mobile devices that are in Ad-hoc mode or Mapview will see the asset as red and will know that it needs to be replaced. Replace (QR) identifier Allows for replacing the Asset identifier - QR code. Which can be used to easily identify asset within a building where no accurate location positioning is possible. Report Observation Creating an observation for that asset. Open in Web Currently not usable from the phone - as the mobile version of the web app version is not ready yet. | A list view of the equipment that needs to be maintained/ inspected. This allows for easily finding which to be selected for indoor- assets.
|
Workorder Summary | Maintenance Instruction Panel |
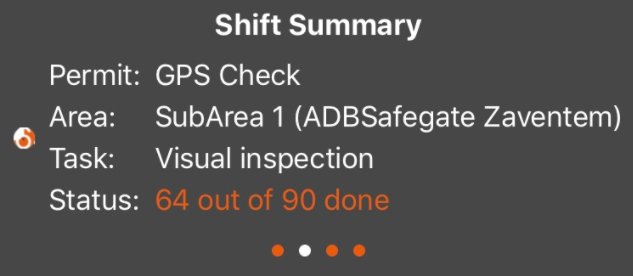 |  |
Overview of Workorder status and task | Overview of sub-tasks to be performed |
Visibility of all registered asset
The map will always display the assets to which maintenance can be registered. Depending on the working mode (see below) you will see all assets on the screen.
Tap to select
To see the details of an asset or to add maintenance data to it, you can simply tap on any asset displayed in the map.
By using the Tap-to-select the Auto-selection function is disabled. The Auto-selection button becomes visible and can be tapped re-use it.
 Auto-selection mode
Now this is it! With Auto-selection mode activated (by default), the technician can approach the asset to be maintained and CORTEX Service will automatically identify the asset and select it.
Depending on the vicinity of other assets, the system can be in three different conditions concerning the certainty of the identification of the asset selection. This will be visualized by the color of the auto-selection certainty button.
The button is GREEN = the system is certain that it has selected the right asset you need to maintain and you can continue without hesitation.
The button is ORANGE = there are one or more assets nearby that could be potential candidates of what you need to maintain. Please verify using the map and your location awareness which asset you need to maintain. You can toggle the asset selection by pushing on the button.
The button is RED = the system has not identified any assets in your near vicinity that should be maintained -
 You can still tap on the asset in the map if you know which asset you need to maintain.
A possible reason for the system to not detect the right asset could beThe GPS location registered in the system for the asset does not correspond with the actual location of the asset.
The GPS device does not have good satellite reception, which results in an inaccurate location representation on the device. Please see the Trimble information page for more info on the Trimble GPS location device.
Is your Trimble RTX Subscription service still valid? Please see Trimble R1 RTX correction service renewal for more info - Valid for 1 year - included in your CORTEX Service Subscription!
Selection range/radius and color
The different candidates selected depends on the size of the range and thus the assets withing that range. The size of the range is related to the GPS accuracy . The better the accuracy the smaller the radius. The radius can be changed manualy by use of the tuning button - see below.
The color of the Selection range informs the user of the GPS accuracy/correction service used.
GREEN = Best possible Satellite reception (Fixed Lock - RTX correction) and thus best localisation estimation.
ORANGE = Satellite reception but no fixed signal or no RTX correction - average location estimation
RED= No Satellite fix and no correction possible - bad location estimation
Zoom and Auto-selection tuning
Buy tapping on the tuning button

you can adapt the settings for the Zoom level and the candidate range.
Drag the buttons up or down to change the factor of the desired function to change. Double tap to reset to default values.
The selection radius will be multiplied with the selected factor to have a smaller or bigger range for candidate selection.
The right Radius depends on the job to be performed and whether a larger or smaller area is desired.
Large Selection radius - quicker but more uncertain of asset to be selected | Small selection Radius - accurate selection of assets but could miss the asset to be selected when too narrow. |
|---|---|
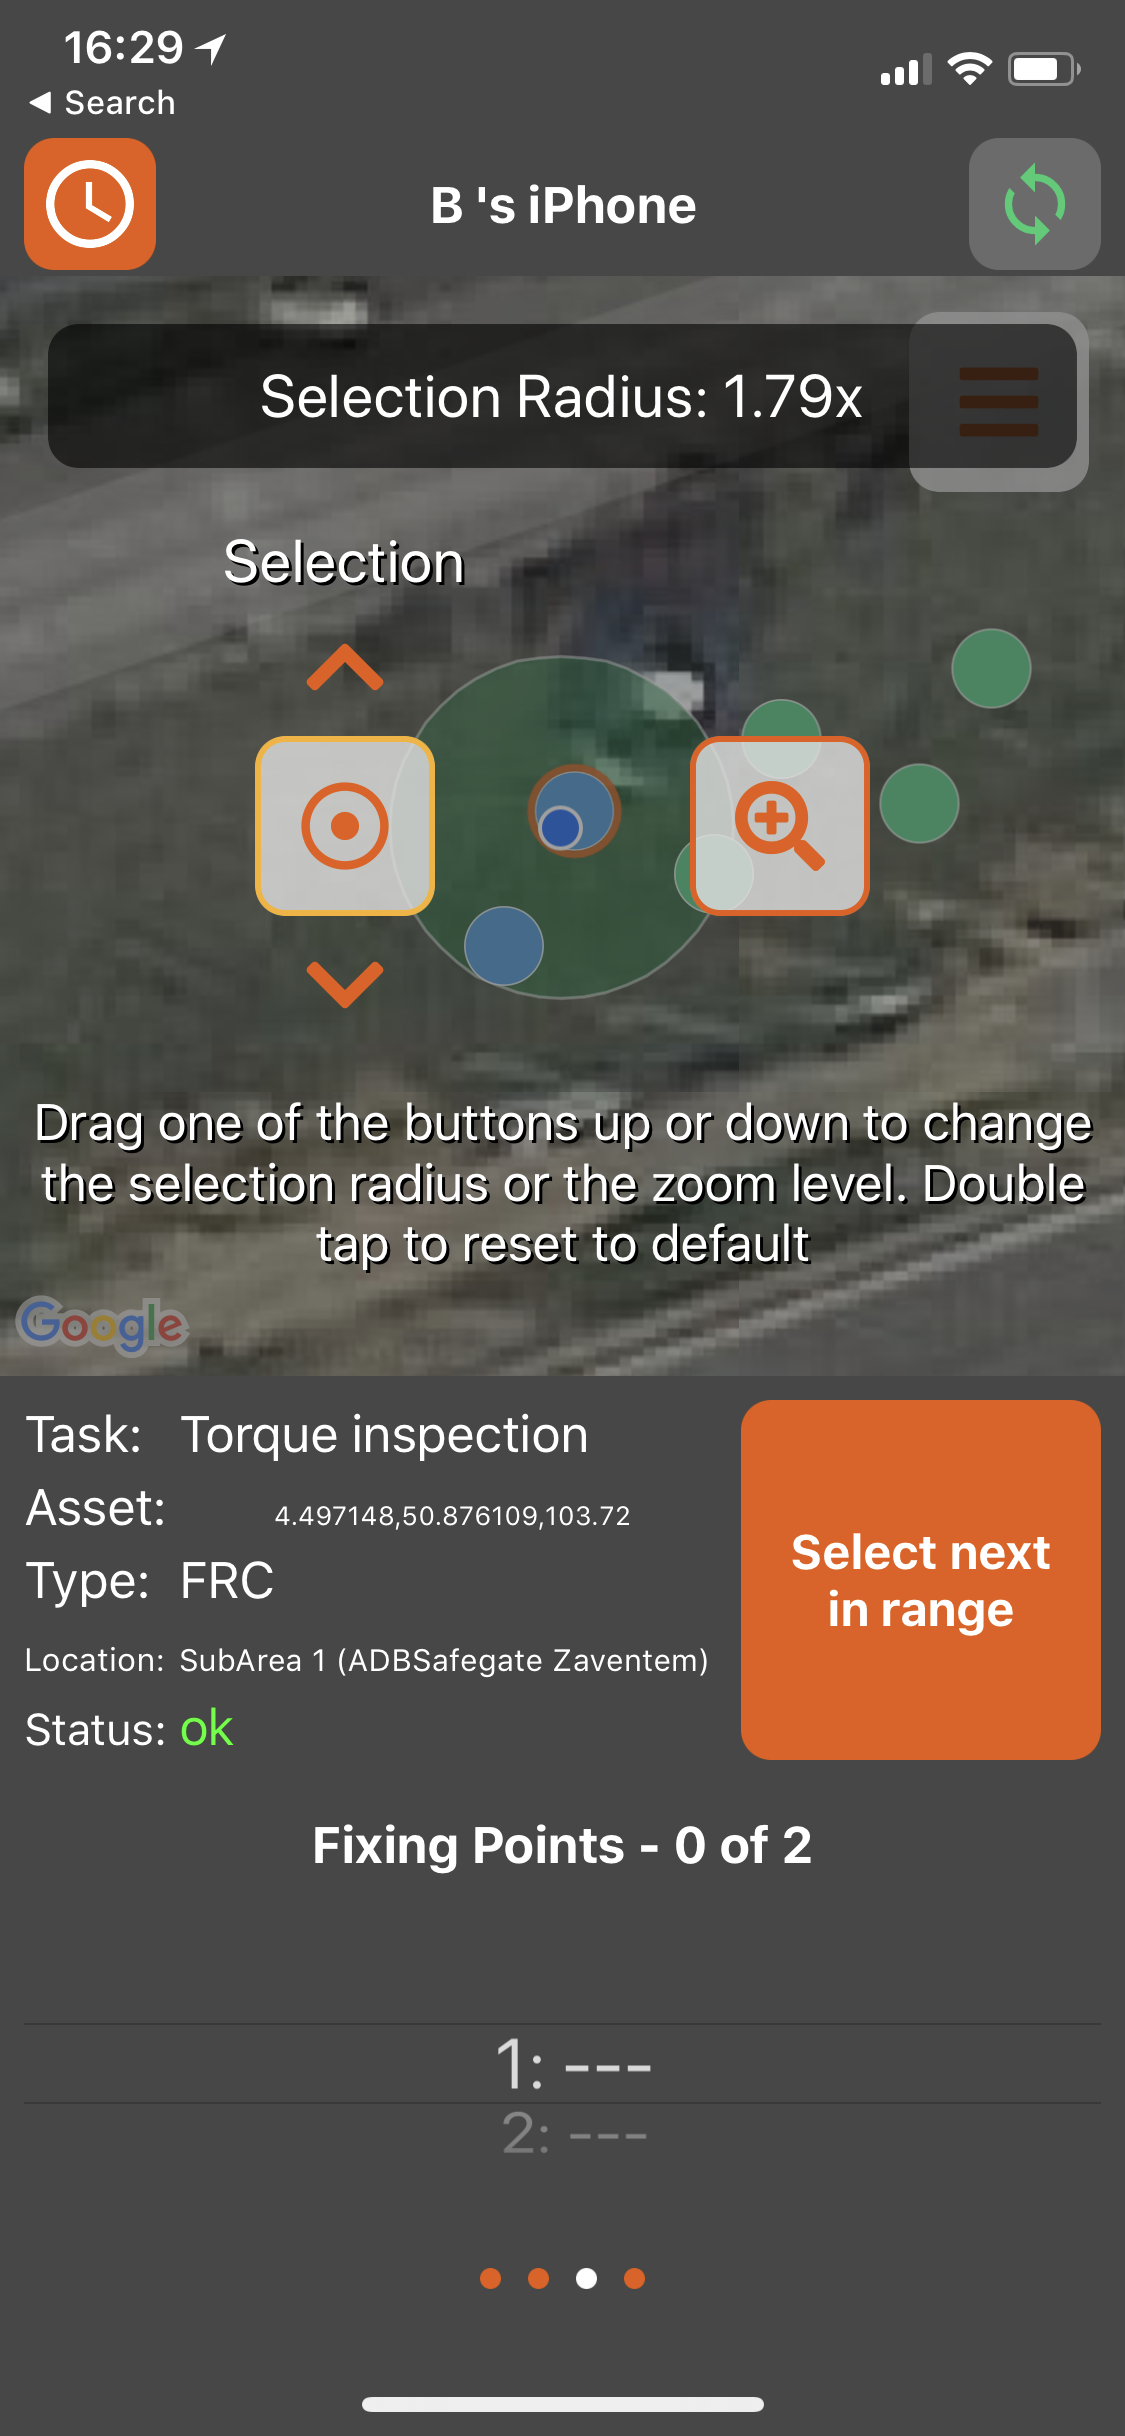 | 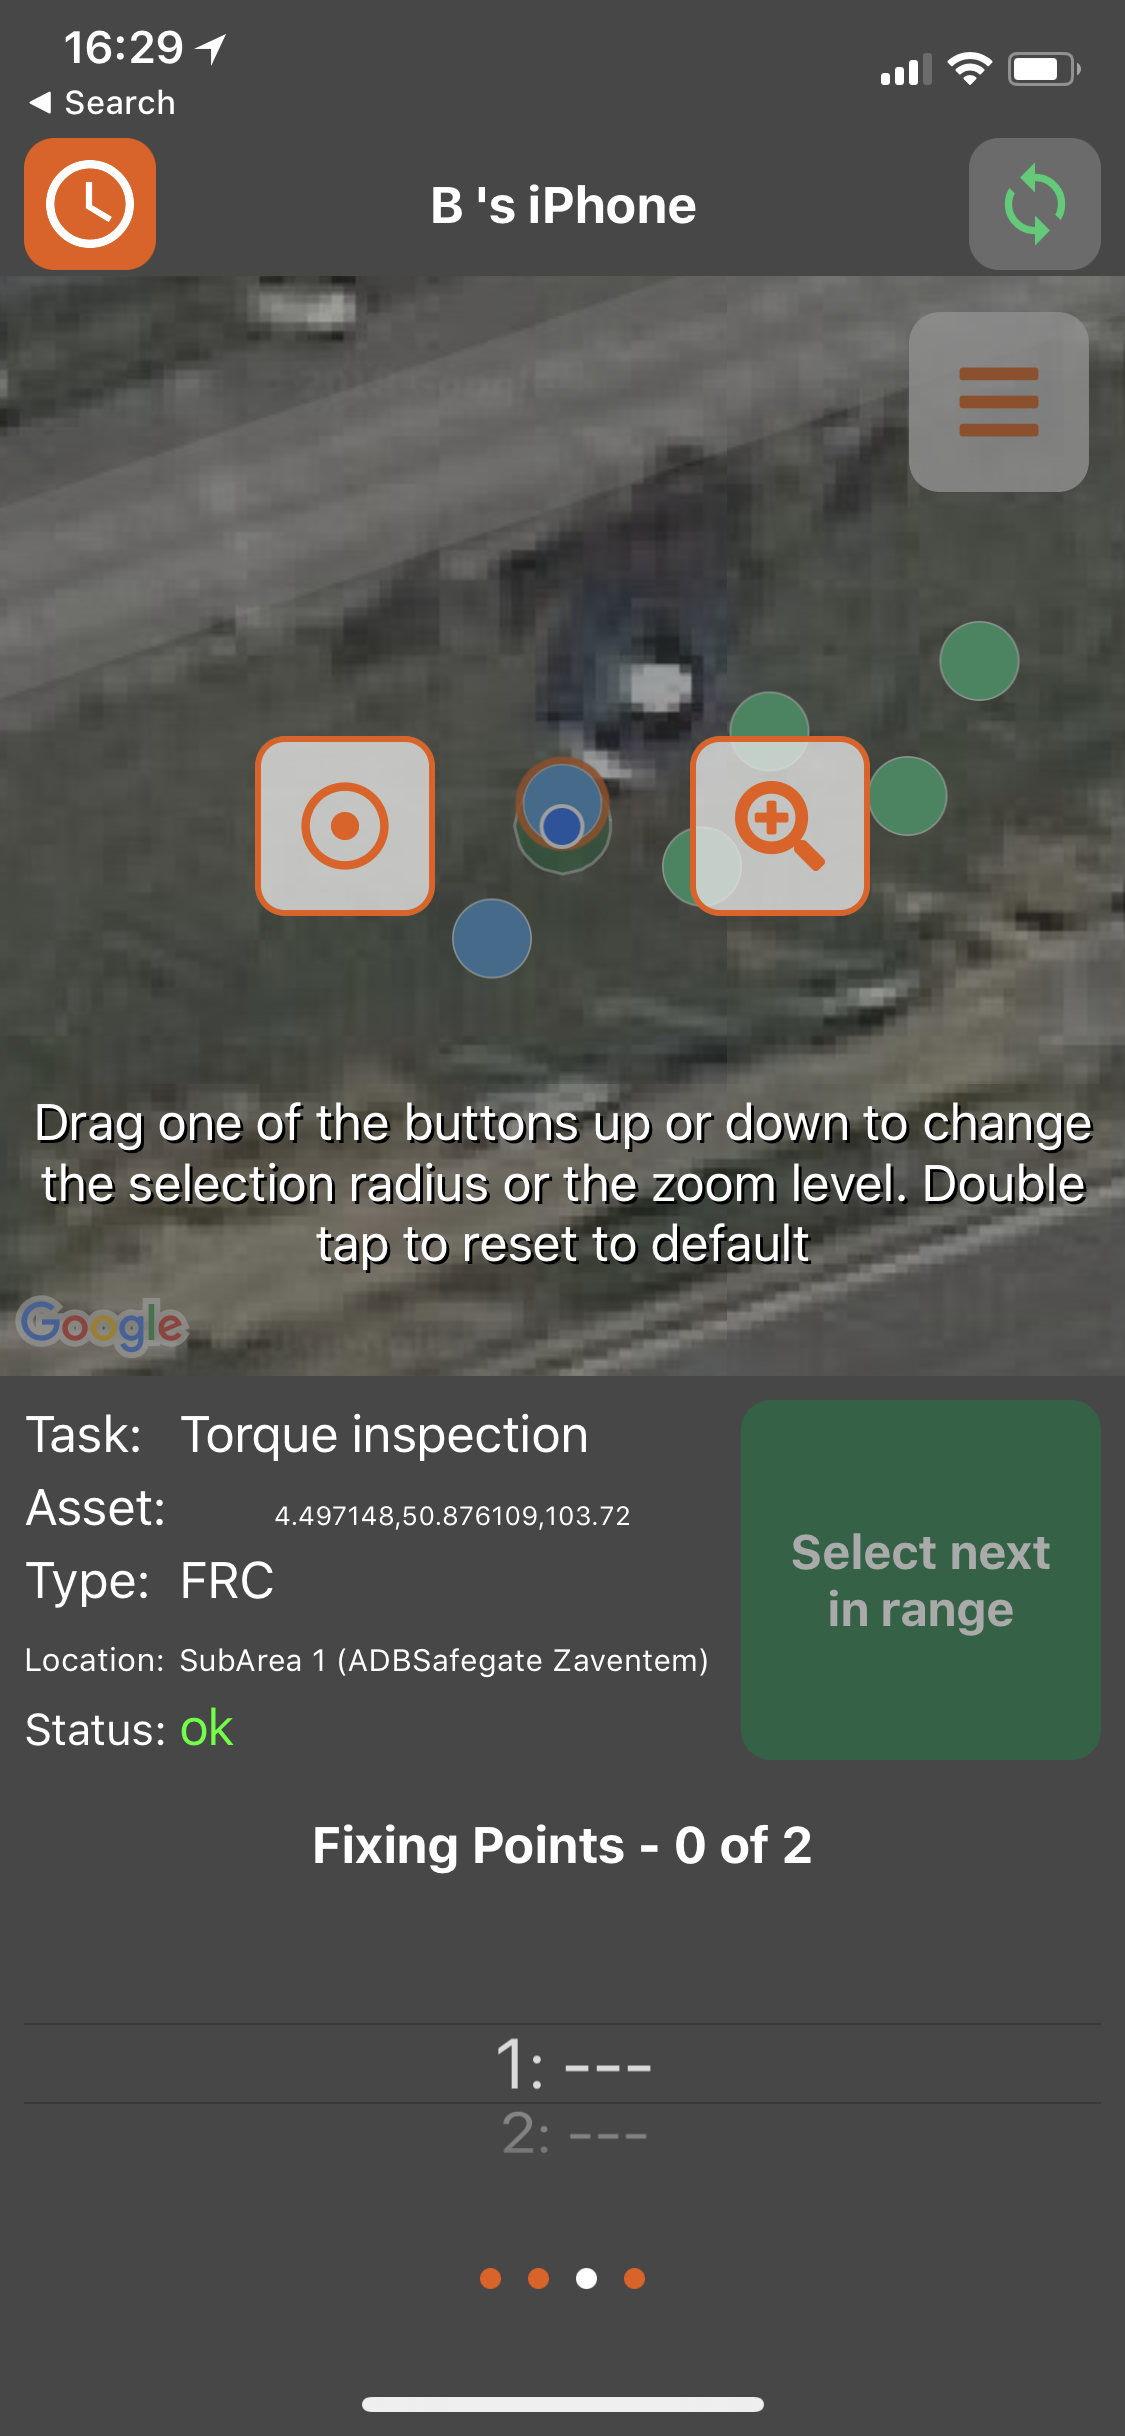 |
Changing the zooming factor can give you a better overview of the assets around you (Large factor) or a more detailed view on the assets near you ( small factor) . The right viewing height depends on the job at hand and personal preference.
Torque workorders
When the torque work orders are created from the web, the information will get pushed to the iOS app. The iPhone can be mounted on the AirTorque wrench and supply the operator with workorder information, asset information and location awareness. Whenever an asset is torqued it will register the maintenance actions under the identified asset.
More detailed information on torque workorders with iOs app can be found in Torque workorders.
Starting from version 2023.1 the Torque wrenches can be paired with both the iPad and iPhone.
Validation workorders
The validation workorders is a generic term for being able to register any kind of maintenance performed as defined in the web-application, under " Assets - Maintenance Tasks" ; By using it's auto-identification function there is no lost time in figuring out which light you need to work on or trying to find the correct asset name for maintenance registration.
More detailed information on validation workorder function in iOS app can be found in Validation workorders .
Ad-hoc mode
Whenever no workorder is active on iOS app - and AUTO workorder mode is ON - the system will go to Ad-hoc mode.
| workorder MODE This device has joined the workorder. Push this button again to leave the workorder mode |
| AD-HOC MODE This device is not in a workorder mode This device can still perform ad-hoc maintenance, report assets as faulty, and create observations. |
Alternatively - Upon pressing the workorder button - Ad-hoc mode can be selected manually.
The following is possible whenever in Ad-hoc
General asset visibility and information
The following actions
Mark as faulty + Replace (QR) identifier | Maintenance Panel |
|---|---|
|  |
Allows for marking an asset as "Faulty". Other devices that are in Ad-hoc mode or Mapview will see the asset as red and will know that it needs to be replaced. Replace (QR) identifier Allows for replacing the Asset identifier - QR code. Which can be used to easily identify asset within a building where no accurate location positioning is possible. Report Observation Creating an observation for that asset. Open in Web Currently not usable from the phone - as the mobile version of the web app version is not ready yet. | Perform maintenance task by ad-hoc. You can edit the task to be performed by use of the edit button. Overview of sub-tasks to be performed
|

QR- Code functionality
An asset can be identified by Location ( through the GPS of the iPhone device or Trimble ) , by selecting the asset manually on a map and for indoor use the QR functionality can be used. To use the QR functionality - please find the needed information in this link QR code function
< Back To CORTEX Service Manual overview