Photometrics
Introduction
In-field Photometric measurements are crucial for maintaining runway lighting, allowing for the identification of failed fittings based on measurement results. Drag and drop photometric data exported from TMS Malms or FBtech to import it into CORTEX Service to manage maintenance tasks effectively. Additionally, set reference illumination levels and set filters to identify assets needing maintenance based on their illumination status.
NEW from 2025.01 - Increased import supplier compatibility ! You can now directly import TMS Malms Photometric results directly into CORTEX Service !
+ With the new Photometrics Workspace you can now see a heatmap of your illumination percentage! Making it even easier to spot lights or areas that need extra attention !
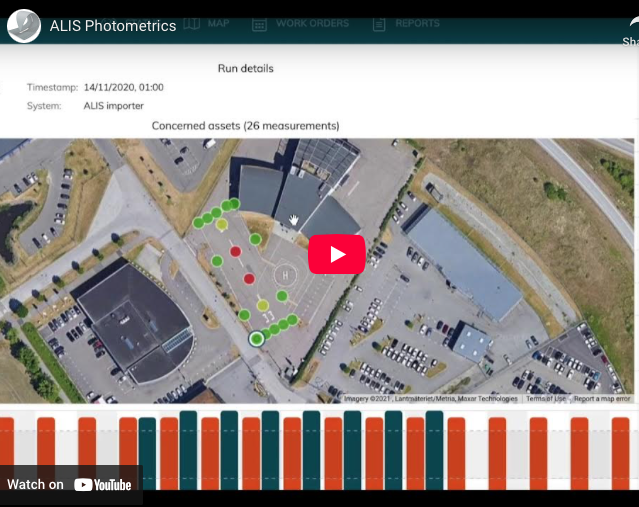
See how CORTEX Service handles photometric data in this Instruction video on Photometrics!
Importing Photometric data
The Photometric section is located under Settings → Photometric
The in-field photometric data files can be imported from TMS MALMS, FBtech or an CORTEX Service custom format in Excel or CSV.
If the section is not available in your instance, contact CORTEX Service support.
https://adbsafegate.atlassian.net/servicedesk/customer/portal/11
TMS MALMS
Data Export
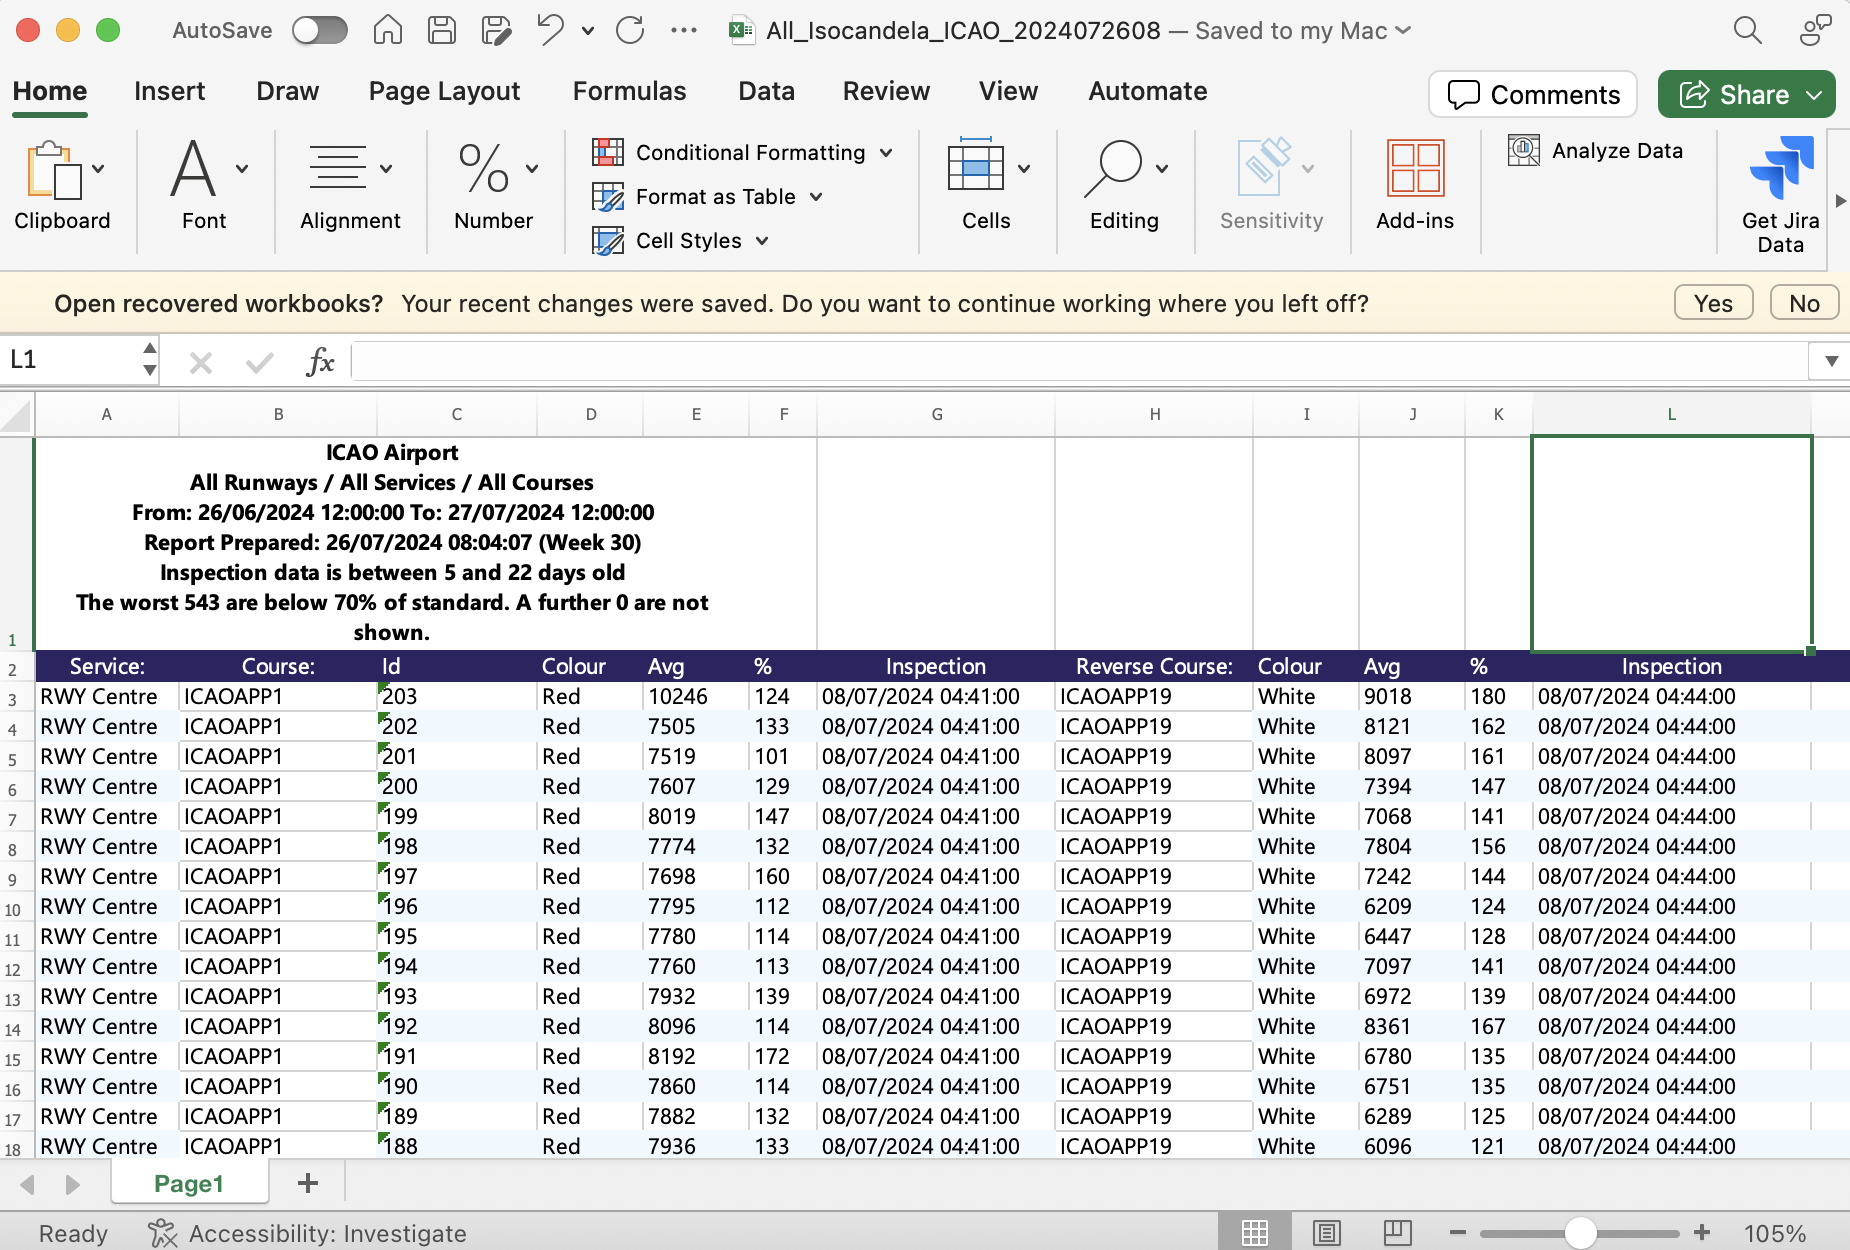
In the TMS Malms Web application, export your measurement fields in the .xlsx format. Note that the filename resembles ALL_Isolocandela_ICAO… as shown in the example below:
Data Import
Go to Settings → Photometric → Import Photometric Data page in CORTEX Service.
TMS Malms assets are identified in CORTEX Service based on the field you select below.
Case 1: The IDs in TMS Malms are the same as in CORTEX Service
This means you use exactly the same name in both systems and can directly use the Name reference in the import options.
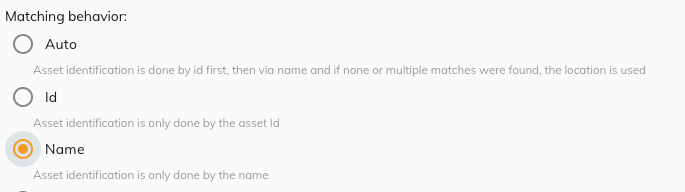
Under Matching behavior, select Name or Auto:
Case 2: Using Lat - Long data for referencing
If Lat/Long GPS information is available in the measurement sheet, you can use that as the reference system (even when the names don’t match).
Note that this feature is untested. We will verify and test for you if you provide an example sheet by contacting CORTEX Service support.
https://adbsafegate.atlassian.net/servicedesk/customer/portal/11
Case 3: the IDs in TMS Malms are not the same in CORTEX Service
A mapping table is required to reference the assets correctly together. Creating the mapping table is a one-time operation; the table can be used for all future Photometric uploads.
If there are changes in TMS Malms or CORTEX Service, the mapping table can be updated.
For assistance with creating a reference sheet for the two systems - you may create a ticket in our service desk.
https://adbsafegate.atlassian.net/servicedesk/customer/portal/11
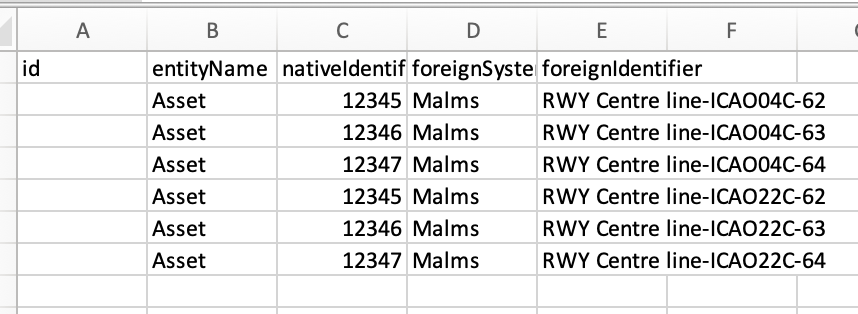
Create an excel sheet with the names of the assets in CORTEX Service and the combination of fields in TMS Malms to create a unique identifier :
Service-Course-Id and Service-Reverse Course-Id (if applicable). See the example below:

You can download the spreadsheet from the example for your convenience.
ALIS - TMS Malms Mapping Template.xlsx
You may provide us with the completed sheet and we will upload it to CORTEX Service if you create a service desk ticket.
https://adbsafegate.atlassian.net/servicedesk/customer/portal/11
To manage the mapping table manually, please note that Advanced Entity Mapping user permissions are required. Please see User Management
Go to CORTEX Service Settings → Admin → Entity Mapping Table. See the following example:
You may download the example spreadsheet:
Select Import to upload your sheet. IDs will be created automatically
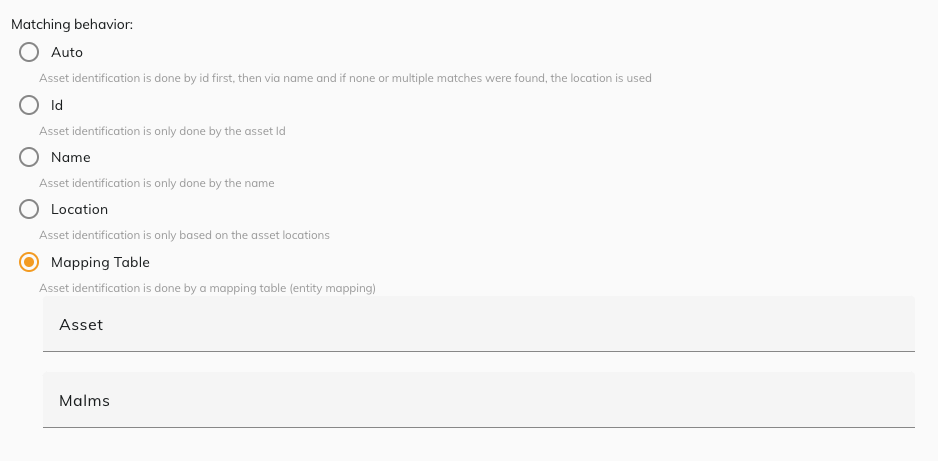
Go to to Settings → Photometric → Photometric Settings
Change the Default Matching Behavior to Matching Table and set the mapping table names Asset and Malms
Once the Mapping Table is created, drag and drop the spreadsheet exported from TMS Malms to the Import Box and under Matching behavior select Mapping Table:
Select Analyse and continue to Validation. See https://adbsafegate.atlassian.net/wiki/spaces/AIM/pages/edit-v2/997490690#Validation
FBtech
In the FBtech application, go to File → Export for AirSide
The selected FBTech Photometric run is exported into a folder with multiple images and a CSV file. The CSV file contains all the lights which were tested in that run; see the example below:
19:18;03/09/2020;L-862 4;L-862 5;;;FBT_00_Sp;PACV5;
1;1;Not found;+3338.0971933;-08426.348458;18593;14614;146;W;1_0.jpeg;
2;1;Not found;+3338.0971933;-08426.348458;17579;14469;144;W;2_0.jpeg;
1;2;Not found;+3338.0971396;-08426.387892;17772;14090;140;W;1_1.jpeg;
Header (transposed):
Column | Description | Value |
|---|---|---|
1 | (local) Time of run | 19:18 |
2 | Date of Run | 03/09/2020 |
3 | Additional Data 1 | L-862 4 |
4 | Additional Data 2 | L-862 5 |
5 | Additional Data 3 | |
6 | Additional Data 4 | |
7 | User | FBT_00_Sp |
8 | System Used? | PACV5 |
Data row (transposed):
Column | Description | Value |
|---|---|---|
1 | Light SIde | 1 |
2 | Light number | 1 |
3 | Internal Name | not found |
4 | Latitude | +3337.9088996 |
5 | Longitude | -08426.751030 |
6 | Max candela | 1455 |
7 | Average candela | 1016 |
8 | Percentage of target candela | 135 |
9 | Color of the light (one side) | R |
10 | Filename with light distribution | 1_0.jpeg |
Drag and drop the CSV file and the image separately to the import page.
CORTEX Service Custom format
When creating the CORTEX Service custom format in Excel, ensure that that the column containing the timestamp is saved as Text:
Select the entire column
Right click → Format Cells
Under Category select Text
Select OK
First row transposed:
Column | Description |
|---|---|
A | Name of run |
B | Timestamp ISO-timestamp - millisecondsSince1970 |
C | Operator |
D | System |
E | Additional data |
Isodates can be in the following formats:
Date: 2020-11-27
Date and time in UTC: 2020-11-27T08:31:24+00:00 or 2020-11-27T08:31:24Z
Second row:
Header Row for measurements - possible headers see below
Order of the headers doesn't count
Third row onward: measurement data based on the headers from second row.
Column Name | Alternatives | Data Format | Required | Note |
|---|---|---|---|---|
numberInRun | number | number | no | |
timestamp | ISO-timestamp|millisecondsSince1970 | no | if not present, the run-timestamp will be used | |
assetName | asset | string | no* | |
sideDiscriminator | side | string | yes | |
latitude | lat | number | no* | Latitude in decimal degrees (e.g. 74.47894) |
longitude | lon | number | no* | Longitude in decimal degrees (e.g. -81.4781) |
maximum | max | number | no | |
average | avg | number | no | |
percentageOfTarget | percentage | number | yes | (0-100 -... ) |
color | string | no | ||
fileName | file | string | no |
Either the assetName field or the location fields need to be filled to be able to identify an asset
Contact your CORTEX Service support if you are having issues creating the CORTEX Service custom format.
https://adbsafegate.atlassian.net/servicedesk/customer/portal/11
Here you can download an example import sheet. Unzip the file and modify the sheet accordingly.
Photometric Measurement Task and Work Order Association.
To start importing Photometric data into CORTEX Service, go to your Settings → Photometric → Import Photometric data.

You can drag and drop complete folders (recommended) or individual files (data and images separately, only for 1 run) separately.
Every Photometric run imported to CORTEX Service will show in the Selected for import section.
Review the imported runs and refer each of them to a maintenance task or corresponding work order.
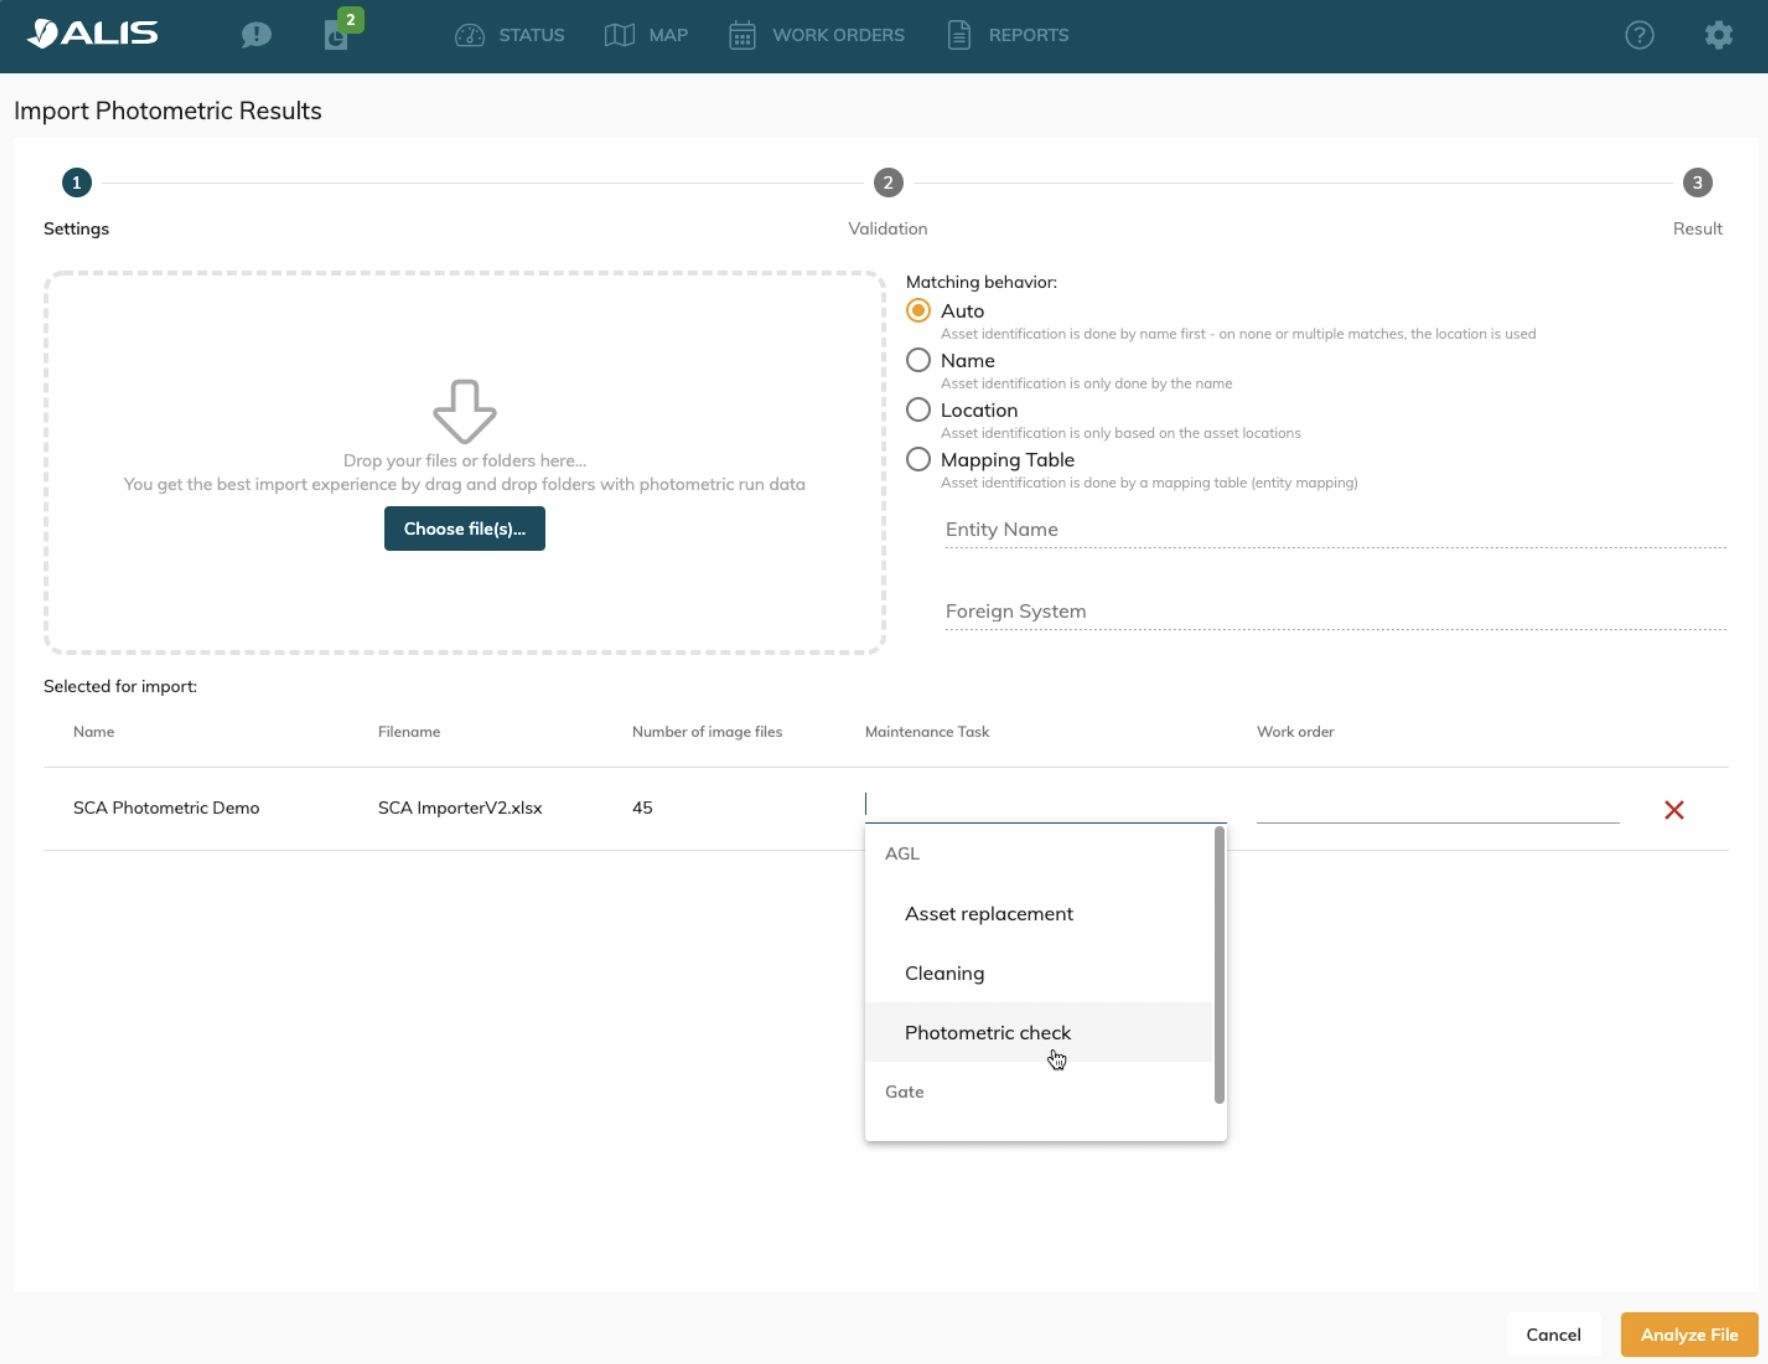
Matching Behavior
This setting defines which assets in CORTEX Service your measurements will be associated with.
Auto: Asset identification is done by name first - on none or multiple matches, the location is used instead
Name: Asset identification is only done by the name. The name in the data-file thus needs to match the names used in CORTEX Service.
Location: Asset identification is only based on the asset locations. This option can be used of the measurements include the location of the measurement (Requires GPS module in your in-field Photometric measurement equipment). CORTEX Service will look at which asset is in the proximity of your measurement location and match the two together.
Mapping Table: Asset identification is done by a mapping table (entity mapping).
When retrieving data from an external system where assets are named differently than in CORTEX Service, create a mapping table that will translate the names from the external system to the internal CORTEX Service names. This way you prevent to always having to change the names manually for every measurement run. You may contact CORTEX Service support to setup a mapping table. When the mapping tables are created in the system , you can enter the Internal Entity Name system and Foreign System. (ie: CORTEX Service and FBtech)
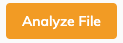
Analyse
When the Photometric runs have been uploaded, maintenance task referenced and matching behavior set, CORTEX Service can start analyzing the Files.
Select Analyse File. If you need to make a correction, you may cancel the import or delete the Photometric run from CORTEX Service .
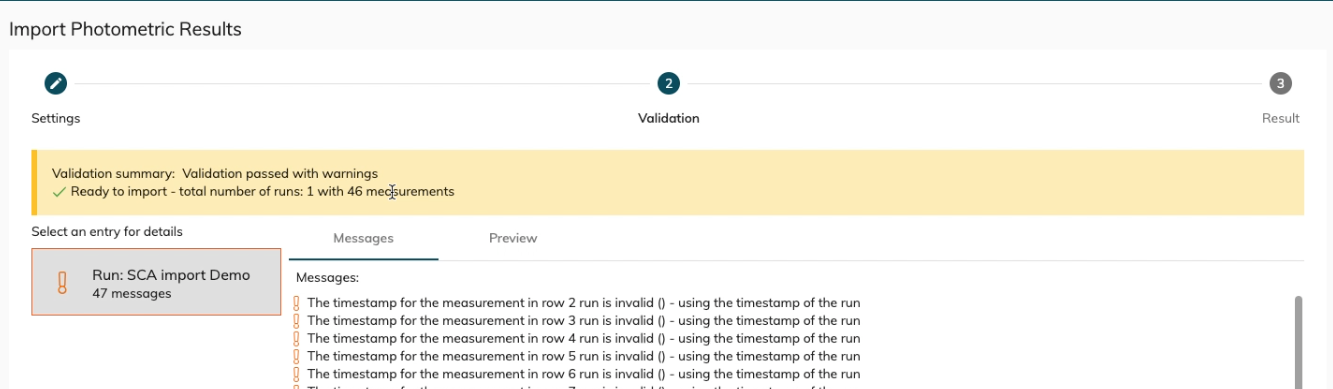
Validation
At this stage, CORTEX Service matches your measurements to existing assets. The validation summary messages are color-coded as follows:
Green: Validation successful
Yellow: Some data missing
Red: Required data missing
For green or yellow messages, you can preview the result before importing it into CORTEX Service. (Select the Preview tab)
You may then select to continue or return to a previous stage to adjust the input.
Validation summary example
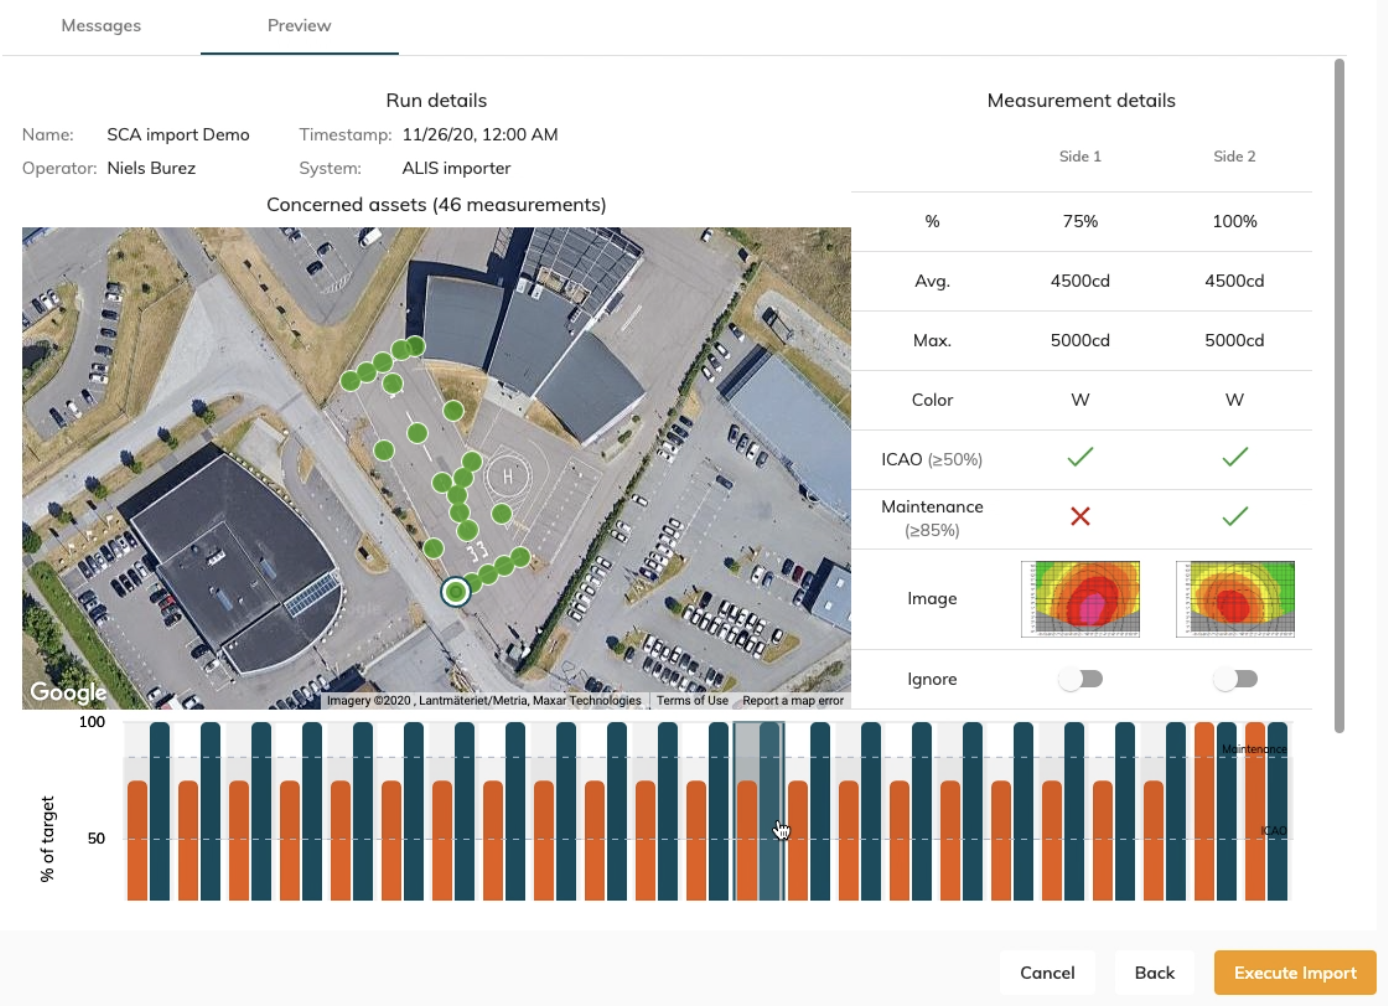
Preview
This section contains an overview of your import data and preview its effect.
You can still go back and rework your import data or cancel the import completely.
Execute
CORTEX Service will now register the maintenance performed on the assets based on the selected tasks.
The import process is now completed.
Upon completion you can go to the map to then review and create work orders where needed on assets that have measurements below the required illumination percentage.
Details of Photometric Measurements per Asset
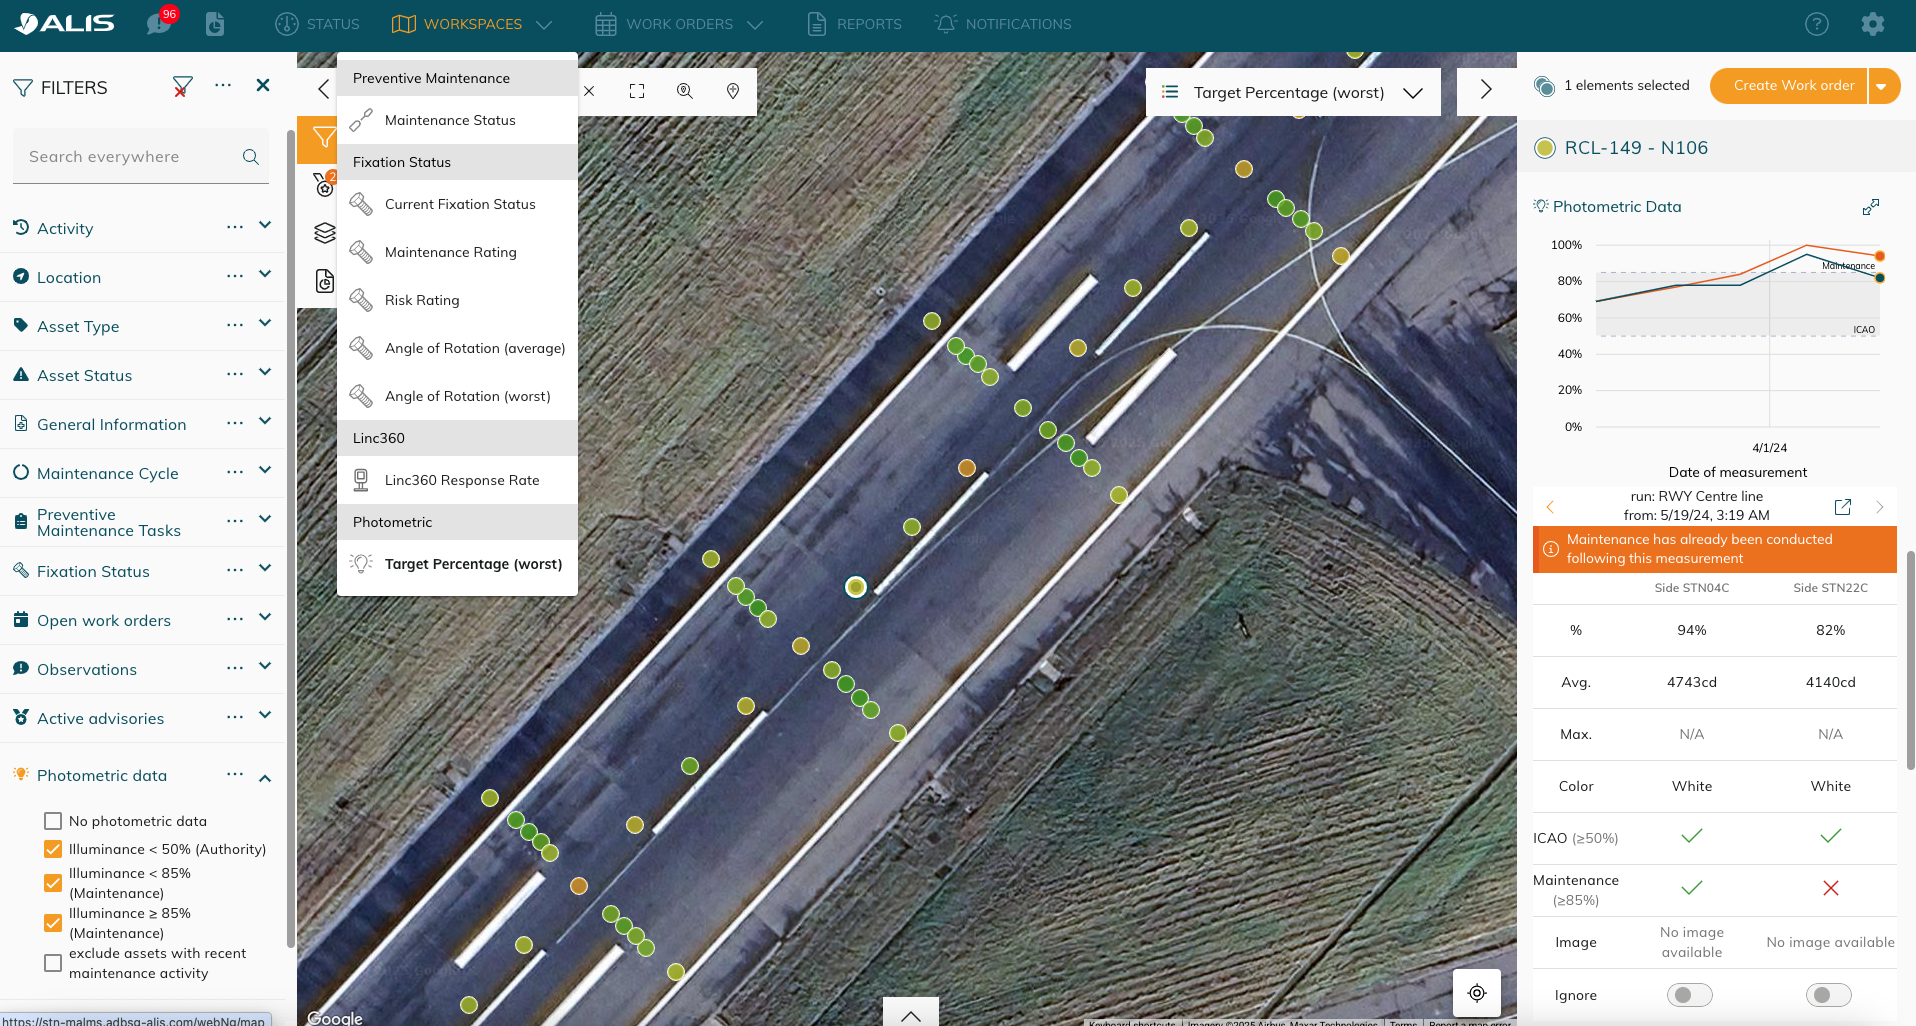
After importing Photometric data, review the work performed by selecting an asset that has Photometric data. This will show the Photometric details in its properties. See the example below:
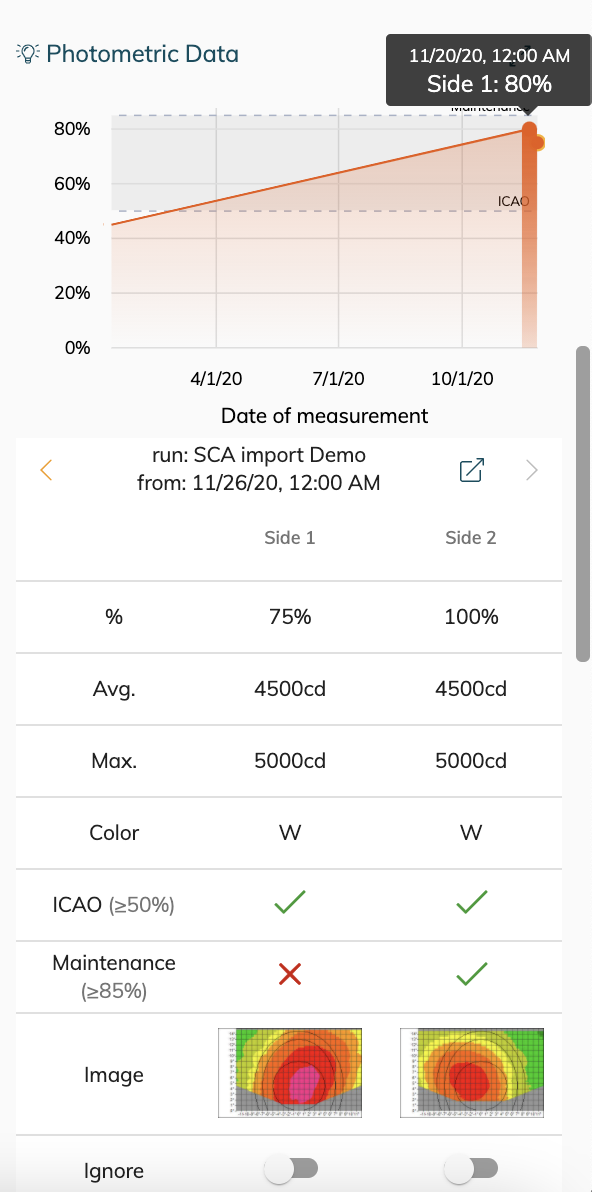
See the following information in this section:
The evolution of the Photometric illumination % (compared to the standard) of each side over time.
The measuring points are selectable in the graph.
Toggle between the different measurement runs in the past to see how our assets Photometric has evolved and what the details are
We can re-open the measurement run as whole in a pop to see how the rest of the assets performed in that run.
We can review the individual measurement parameters per side - per run in the table and see how those values compared to the standards as set in the system.
There is a miniature image of the Photometric measurement per side.
The images of the Photometric measurements are selectable - they will enlarge to have a better view on them.
You can choose to ignore a measurement if you know that this measurement was incorrectly taken and would not give the desired end-result.
In the history of the asset there will be a record to show when the Photometric data was imported.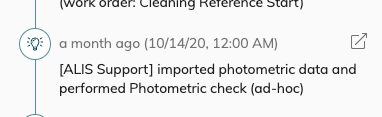
Photometric Settings
Go to Settings → Photometric Settings
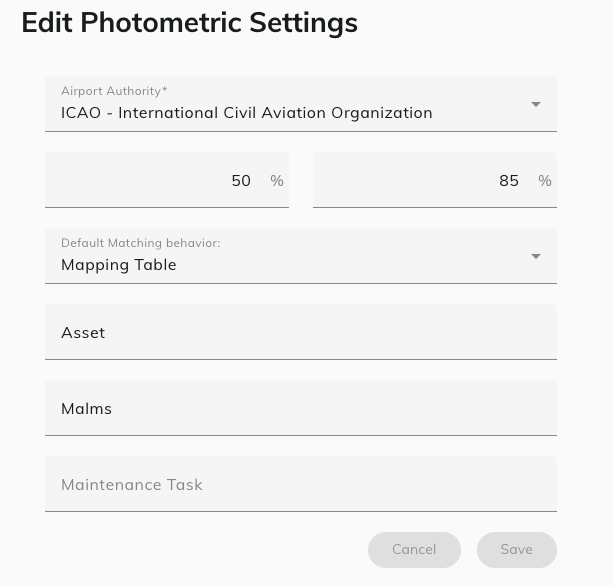
In this section, set the Maintenance Threshold, which is used to filter assets in the next section. Additionally, set the Authority Threshold which determines which lights are compliant.
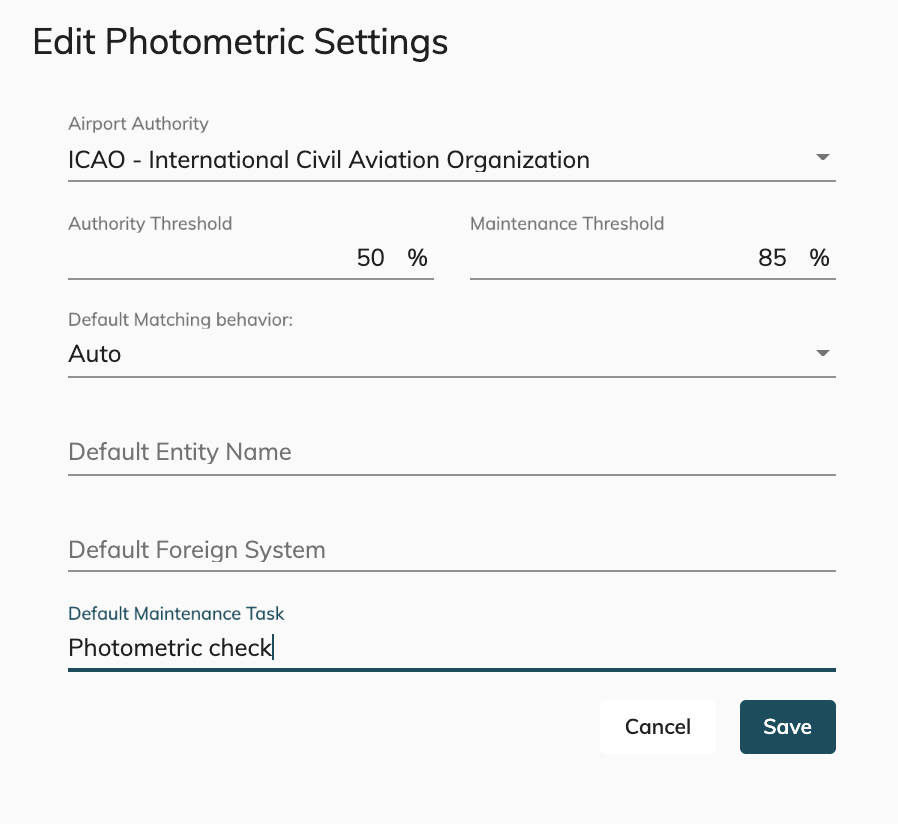
For example, ICAO considers a light to be faulty when its illumination is less than 50% but your local airport authority wants to have the illumination to a minimum of 85% .
Additionally, configure the default settings which may help in the import process.
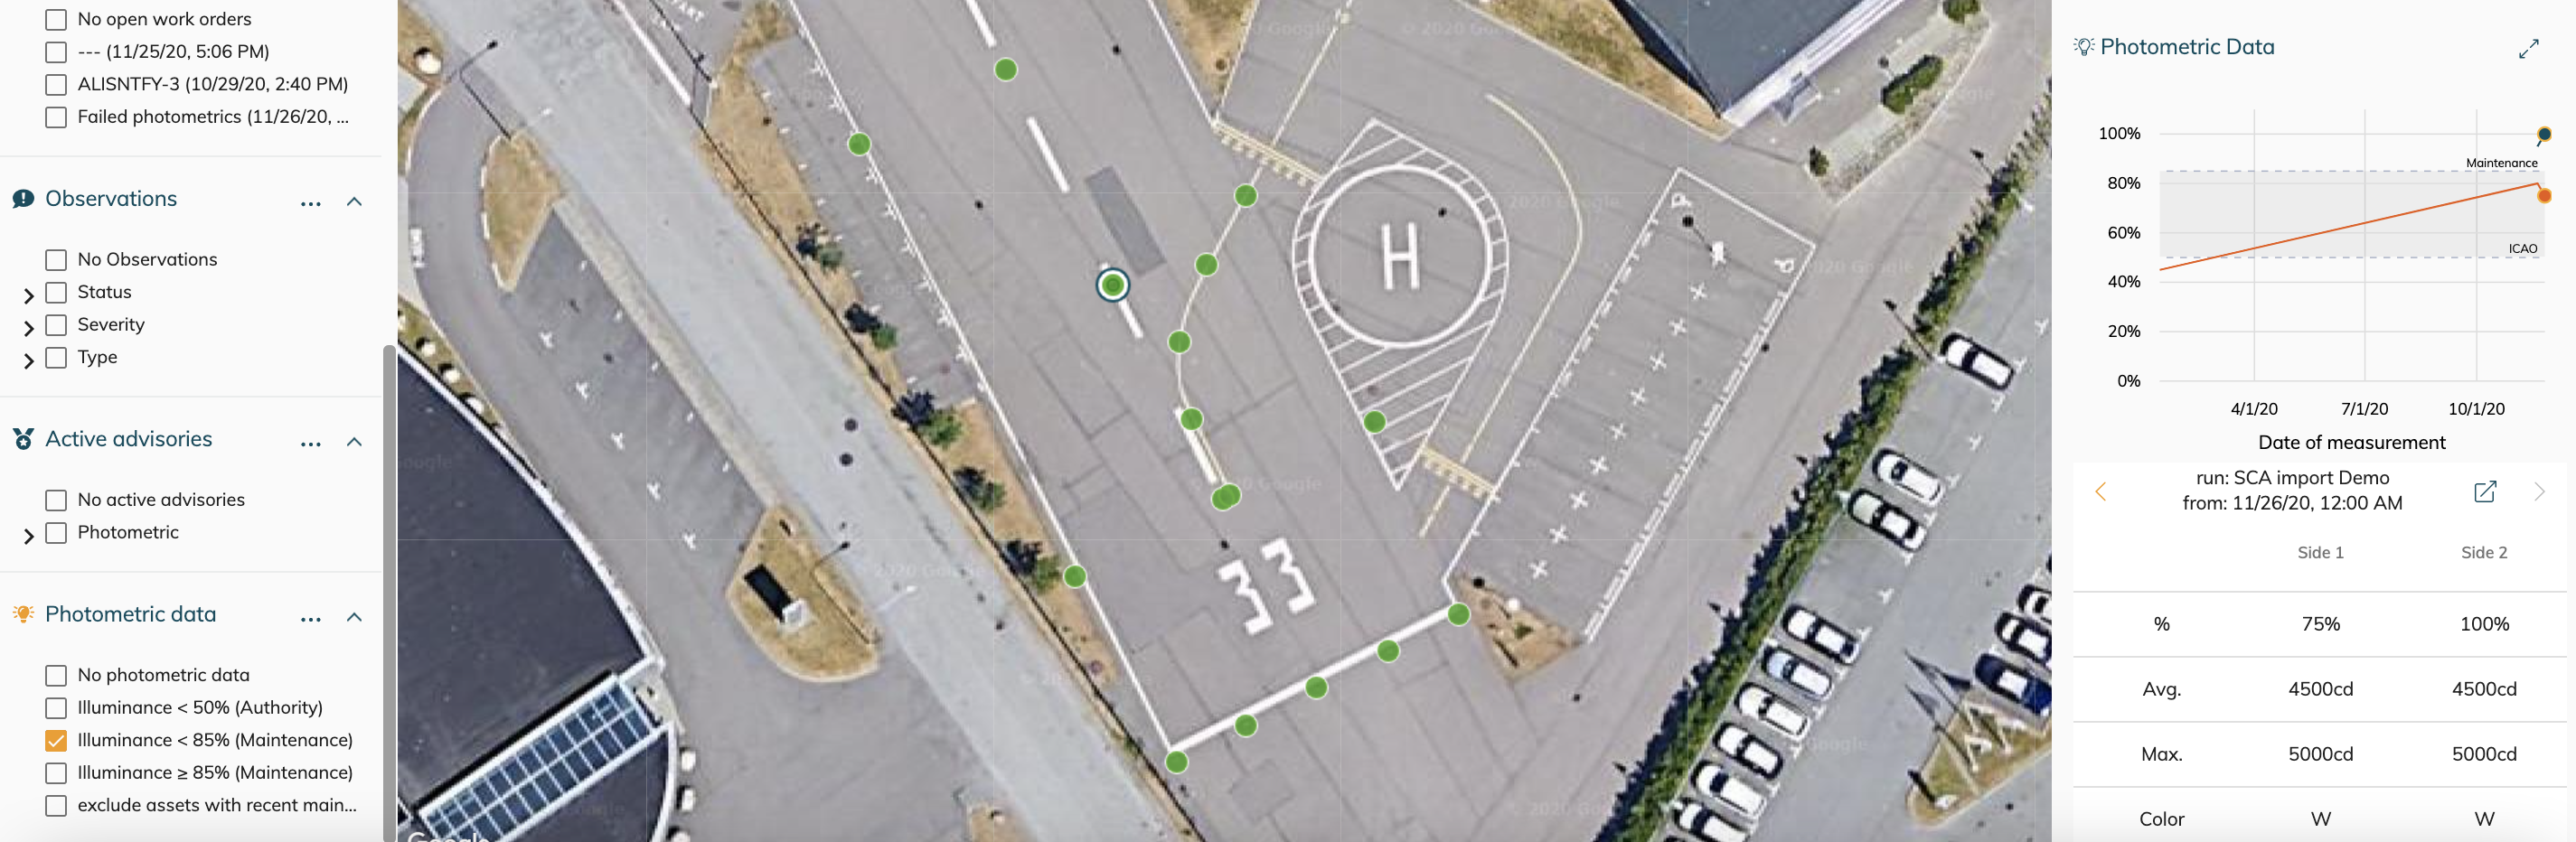
Using Photometric Filters
In this section, filter out the assets that match certain conditions based on the thresholds set in the previous section.
In the example below assets that have a Photometric status that is below 85% are filtered out. The details for the selected asset show that Side 1 is under 75% and is therefore in the filtered list.
Use the asset selector to select all the assets to be maintained and created the required work order.
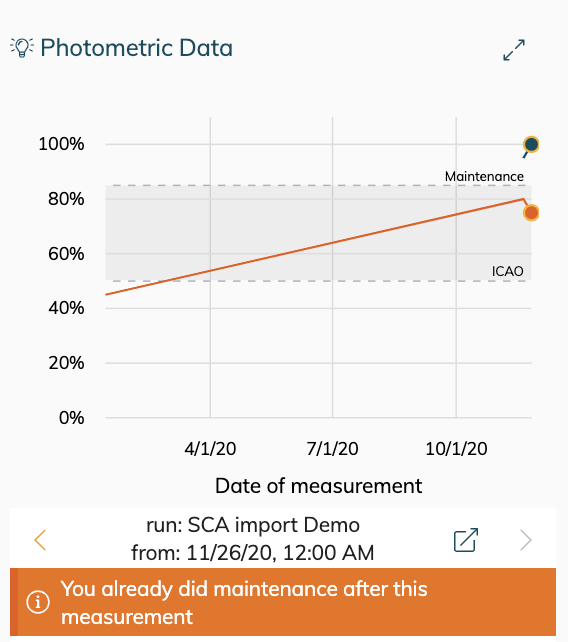
Outdated Photometric Data
CORTEX Service assists to prevent redundant maintenance from being scheduled for assets with outdated photometric data; Assets which have undergone maintenance, but not had a photometric run performed, are marked with a warning sign in the photometric properties. See the example below:

Advisories on Photometrics
Before proceeding, please see CORTEX Service - Advisories
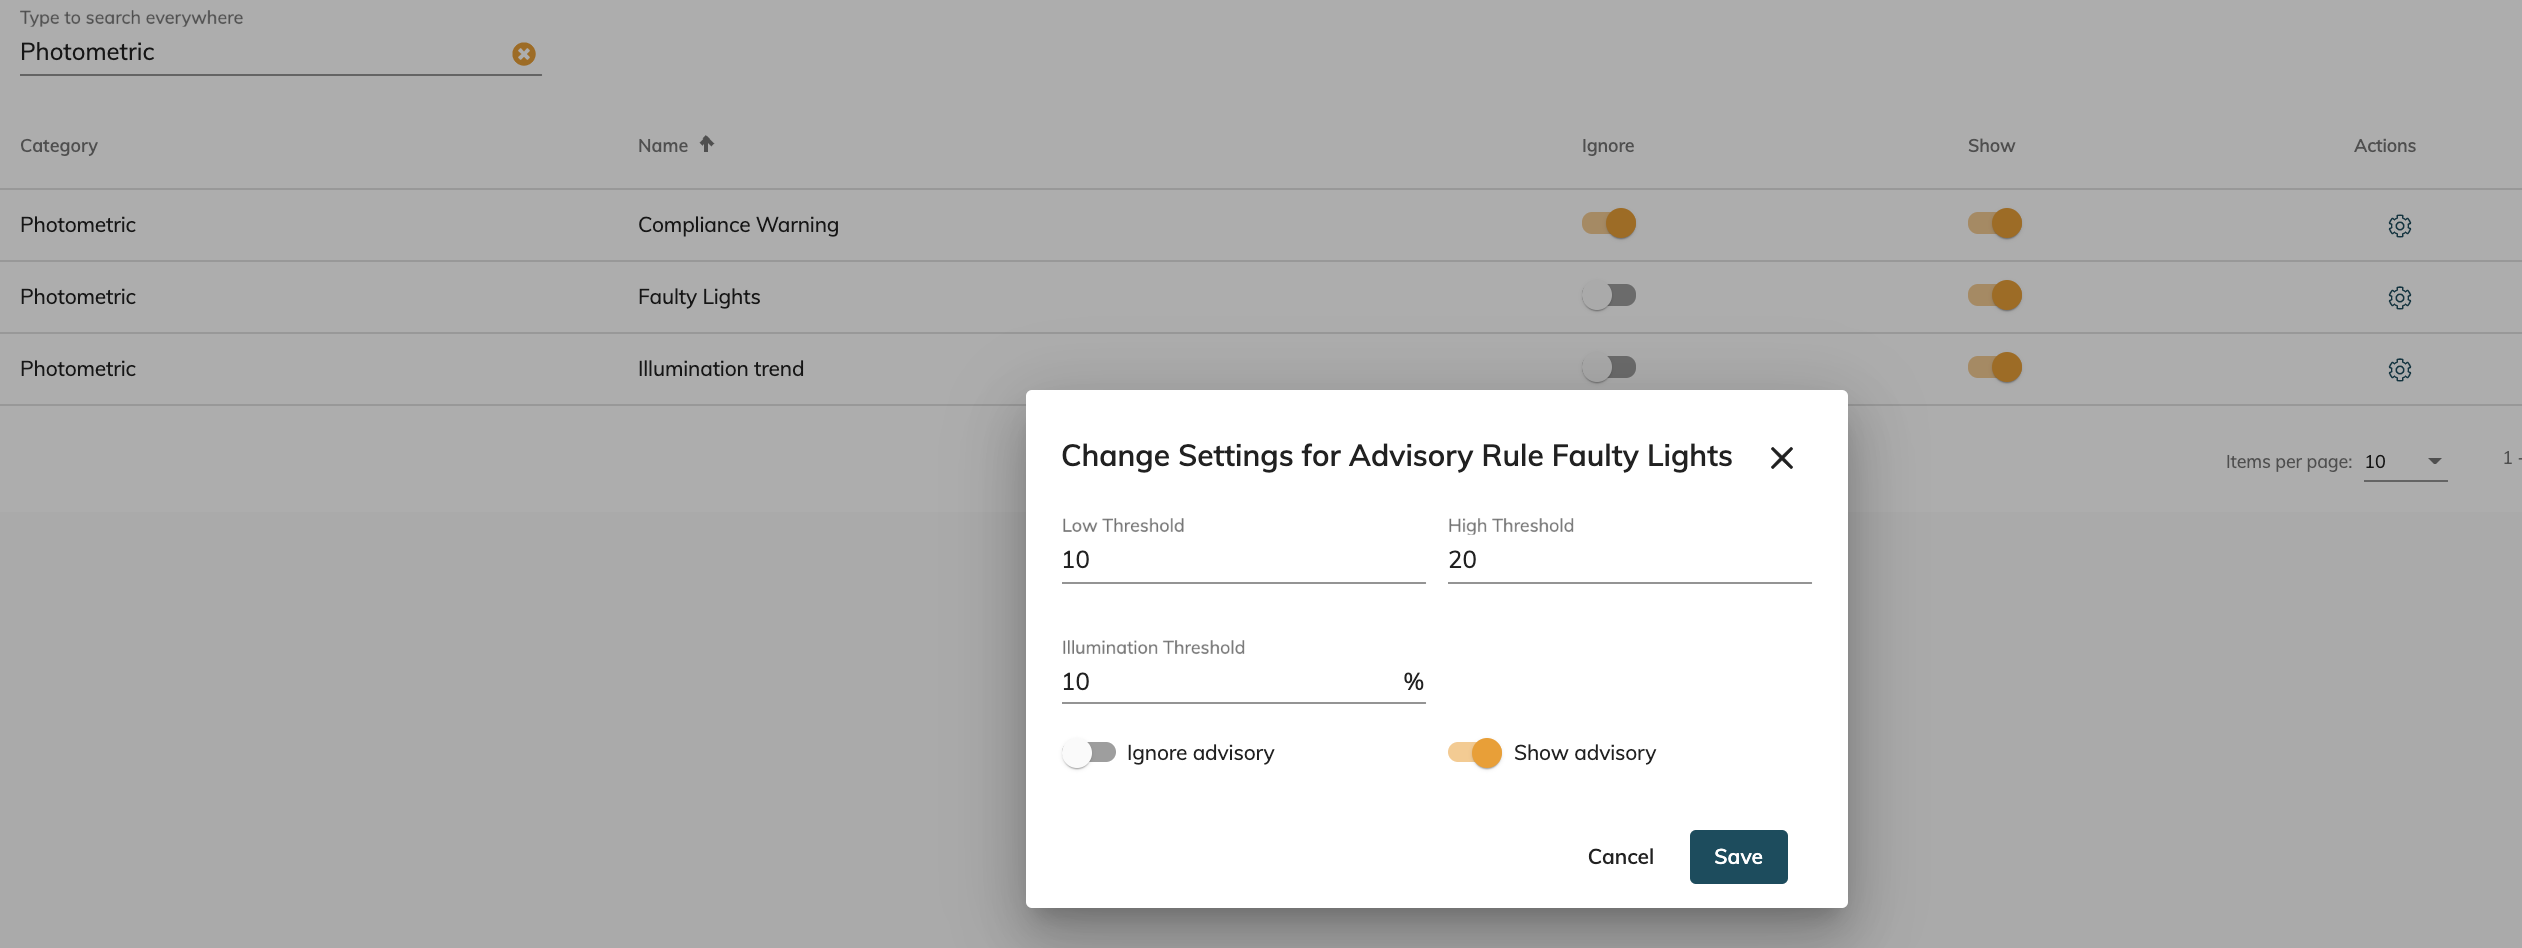
The following rules are implemented and optional, and the default settings can be modified.
Advisory | Description |
|---|---|
Compliance Warning | There are X% of assets in the same subarea that show sign of insufficient illumination output. |
Faulty Lights | More than X% of your assets have an illumination that is less than X% and have thus failed! |
Illuminiation trend | The illumination degradation per day for xx assets is above x.x . |
Select the gear icon ⚙️ for each rule to modify its parameters.