
How-to add/change/delete assets in your ALIS instance
You can directly edit the asset details in the Webapplication. When you have the right permission you can select one or multiple assets - Orange Action button top right dropdown - Edit Asset(s) .
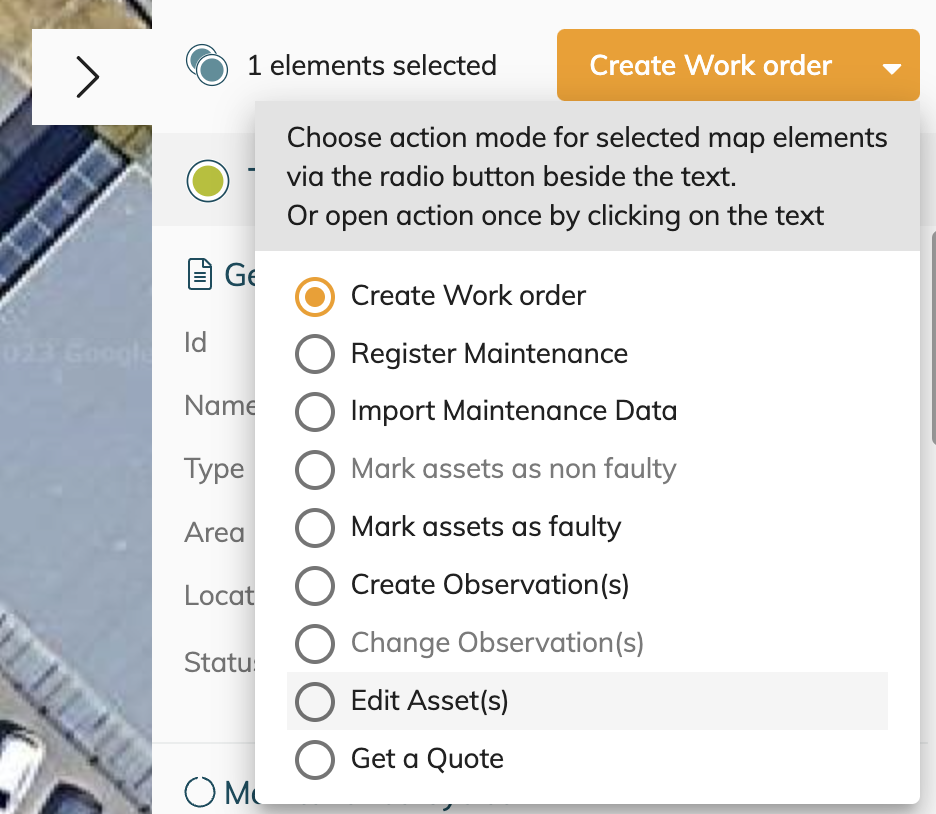
Edit Asset(s) feature
🚀 How to edit Asset data
Up to releases before v2023.02 if you wanted to Add/Remove/Edit Asset details you had to use our Import/Export Method, this is still the best method if you prefer to use the excel features for your asset changes, but now you can do it directly and very visual in the MAP workspace.
You can now
Select and Edit 1 Asset
Select and Edit Multiple Assets ( where you changes will be applied to all selected assets)
Select and remove 1 Asset
Select and remove multiple Assets
Drop a Pin and create 1 new Asset

Example of single Asset Edit
Editing the Main- and/or Sub Area will automatically add or remove the area’s as needed!
Deleting an asset will close any related observation and will be removed from Open and Closed work orders
🧭 Move or reposition your Asset(s)!
Are your assets not exactly on the the right spot? You can now reposition your assets by giving them a new location
by supplying a new position value by
Lat , Long ( WGS84)
UTM
by Offsetting it’s current location by
amount of meter vertical and/or horizontal
amount of feet vertical and/or horizontal
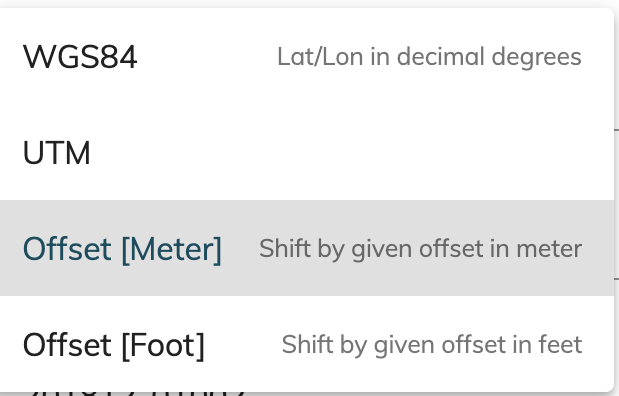
You will get a live representation of the new position of the assets when providing a valid location or Offset value.