
Ingersoll Rand QX Wrench - First time use
TLDR; The initial use of the wrench should involve setting up the torque and angle values beforehand using the INSIGHTConnect app to ensure optimal performance. These configurations are adjustable and can be modified at a later time.
Quick starter guide to set up the wrench using the INSIGHTConnect app
Download the INSIGHTConnect app. The app is used for setting up the wrench at the beginning.
Tip: You can change the language via the app setting
Connect the wrench to the app
Wrench: plug the battery into the wrench. Once it starts up, choose the app pairing mode.
INSIGHTConnect app: open the app on your phone, click on ‘Connect to the tool’, and follow the screen
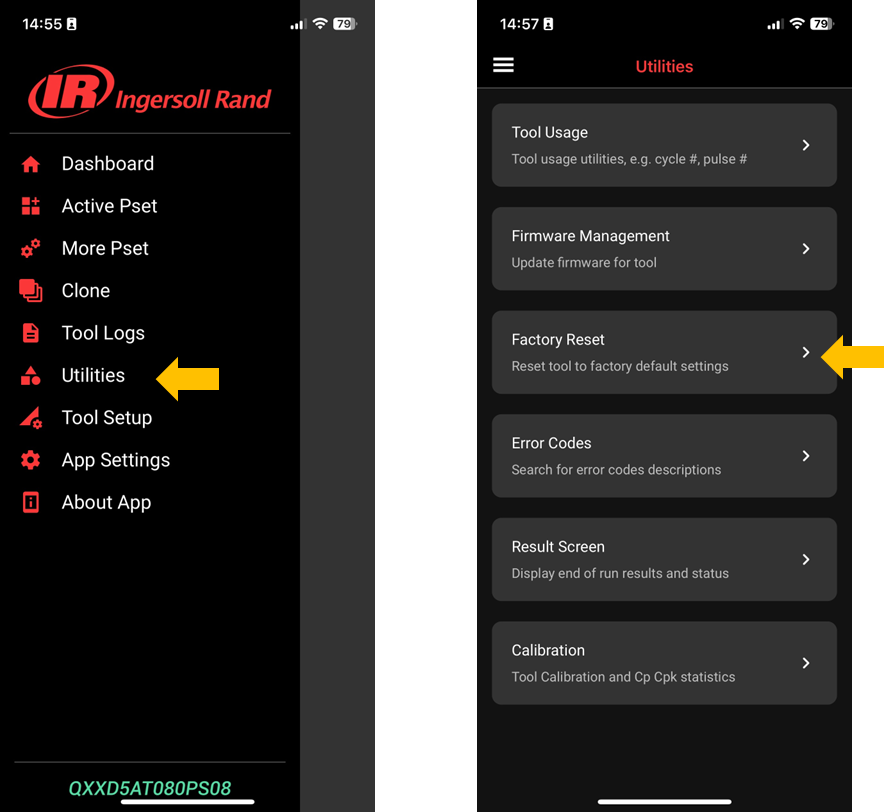
Remark: if you find that the wrench has some problems with the connection, you can try to reset it to factory.
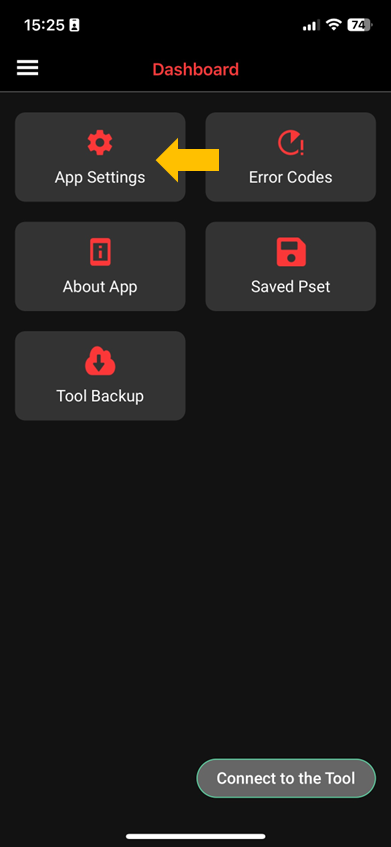
By default, the app and the phone will be disconnected after 60 seconds (sleep timeout). It is recommended that you change this setting, so you have more time to set up the wrench.
Go to the 3 lines → Tool Setup → Interface Setup → Edit → Sleep Timeout (s)
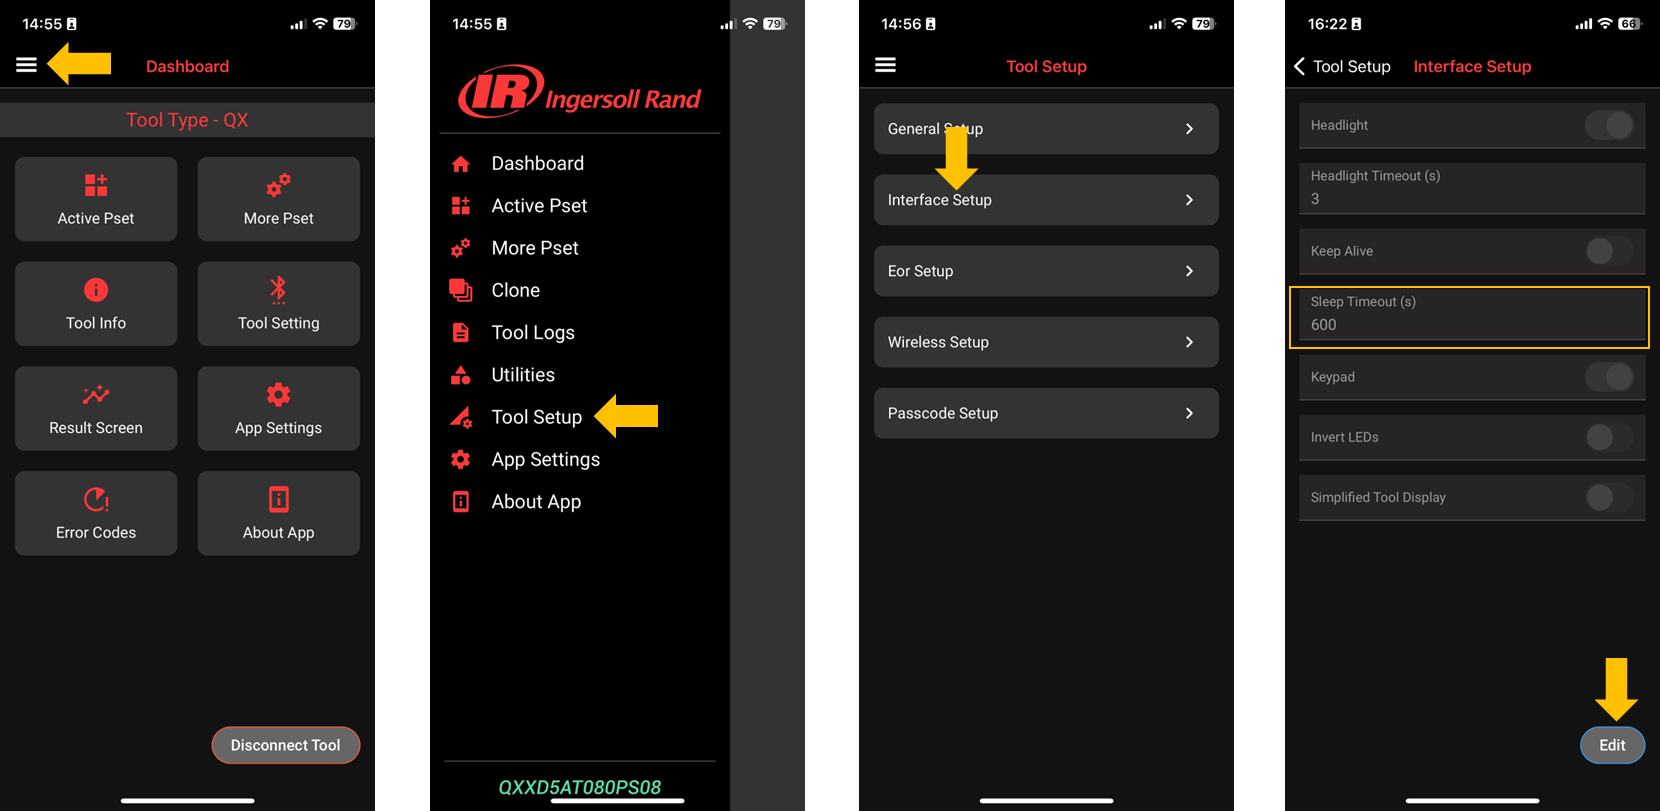
Recommendation: set it to 600seconds (10 minutes) or less to avoid overheating
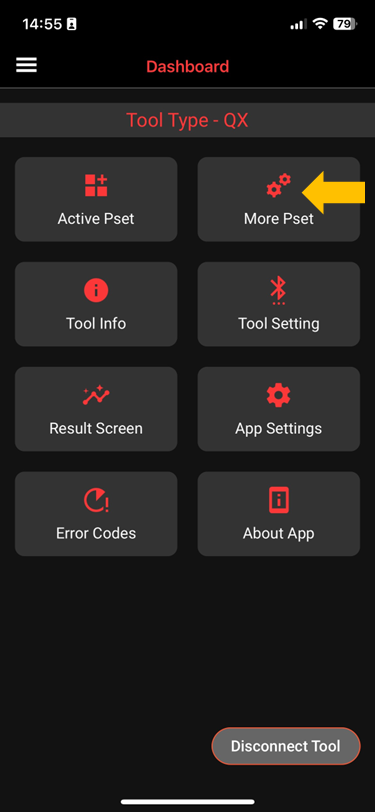
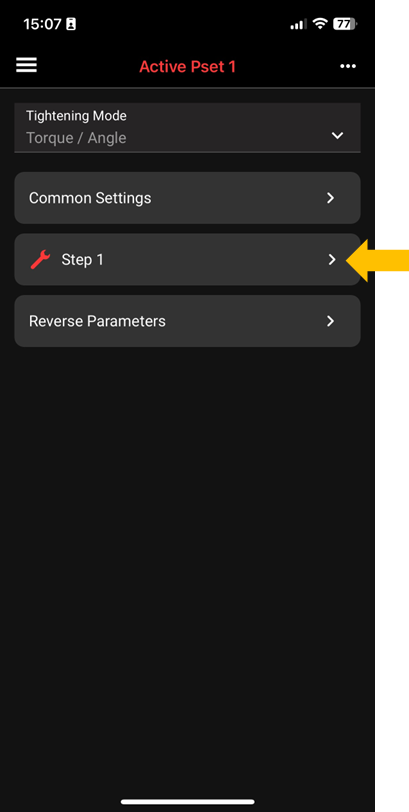
Go back to the dashboard and click ‘More Pset’; this is where you can pre-program the wrench. You can edit or add them (up to 38 psets).

“Standard mode” (NOT Basic)
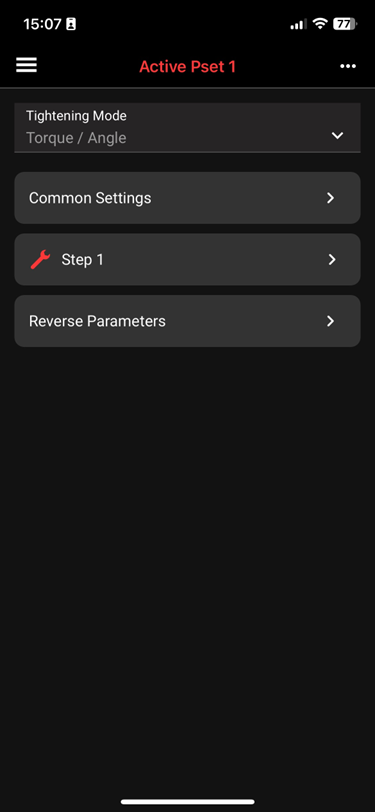
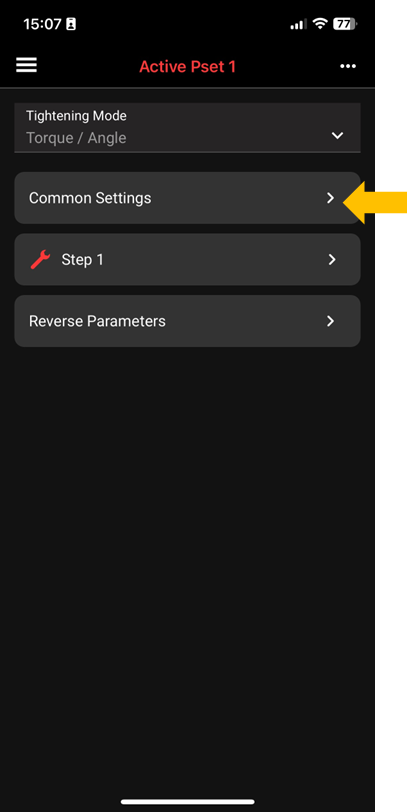
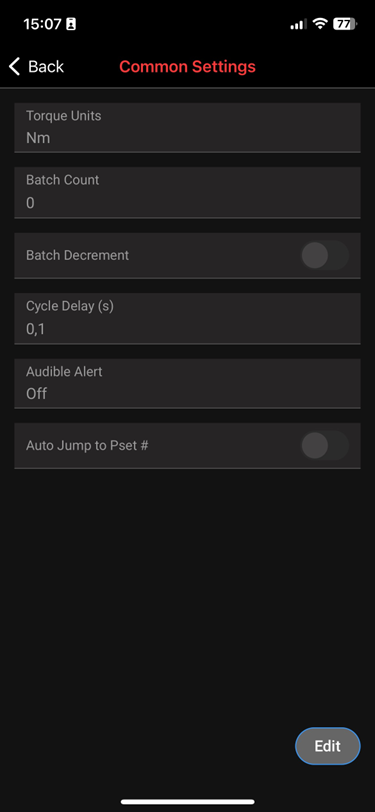
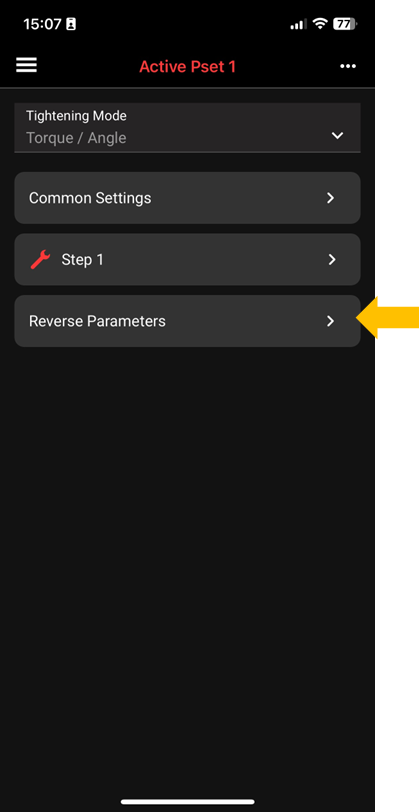
Change the common setting, Step, Reverse Parameters
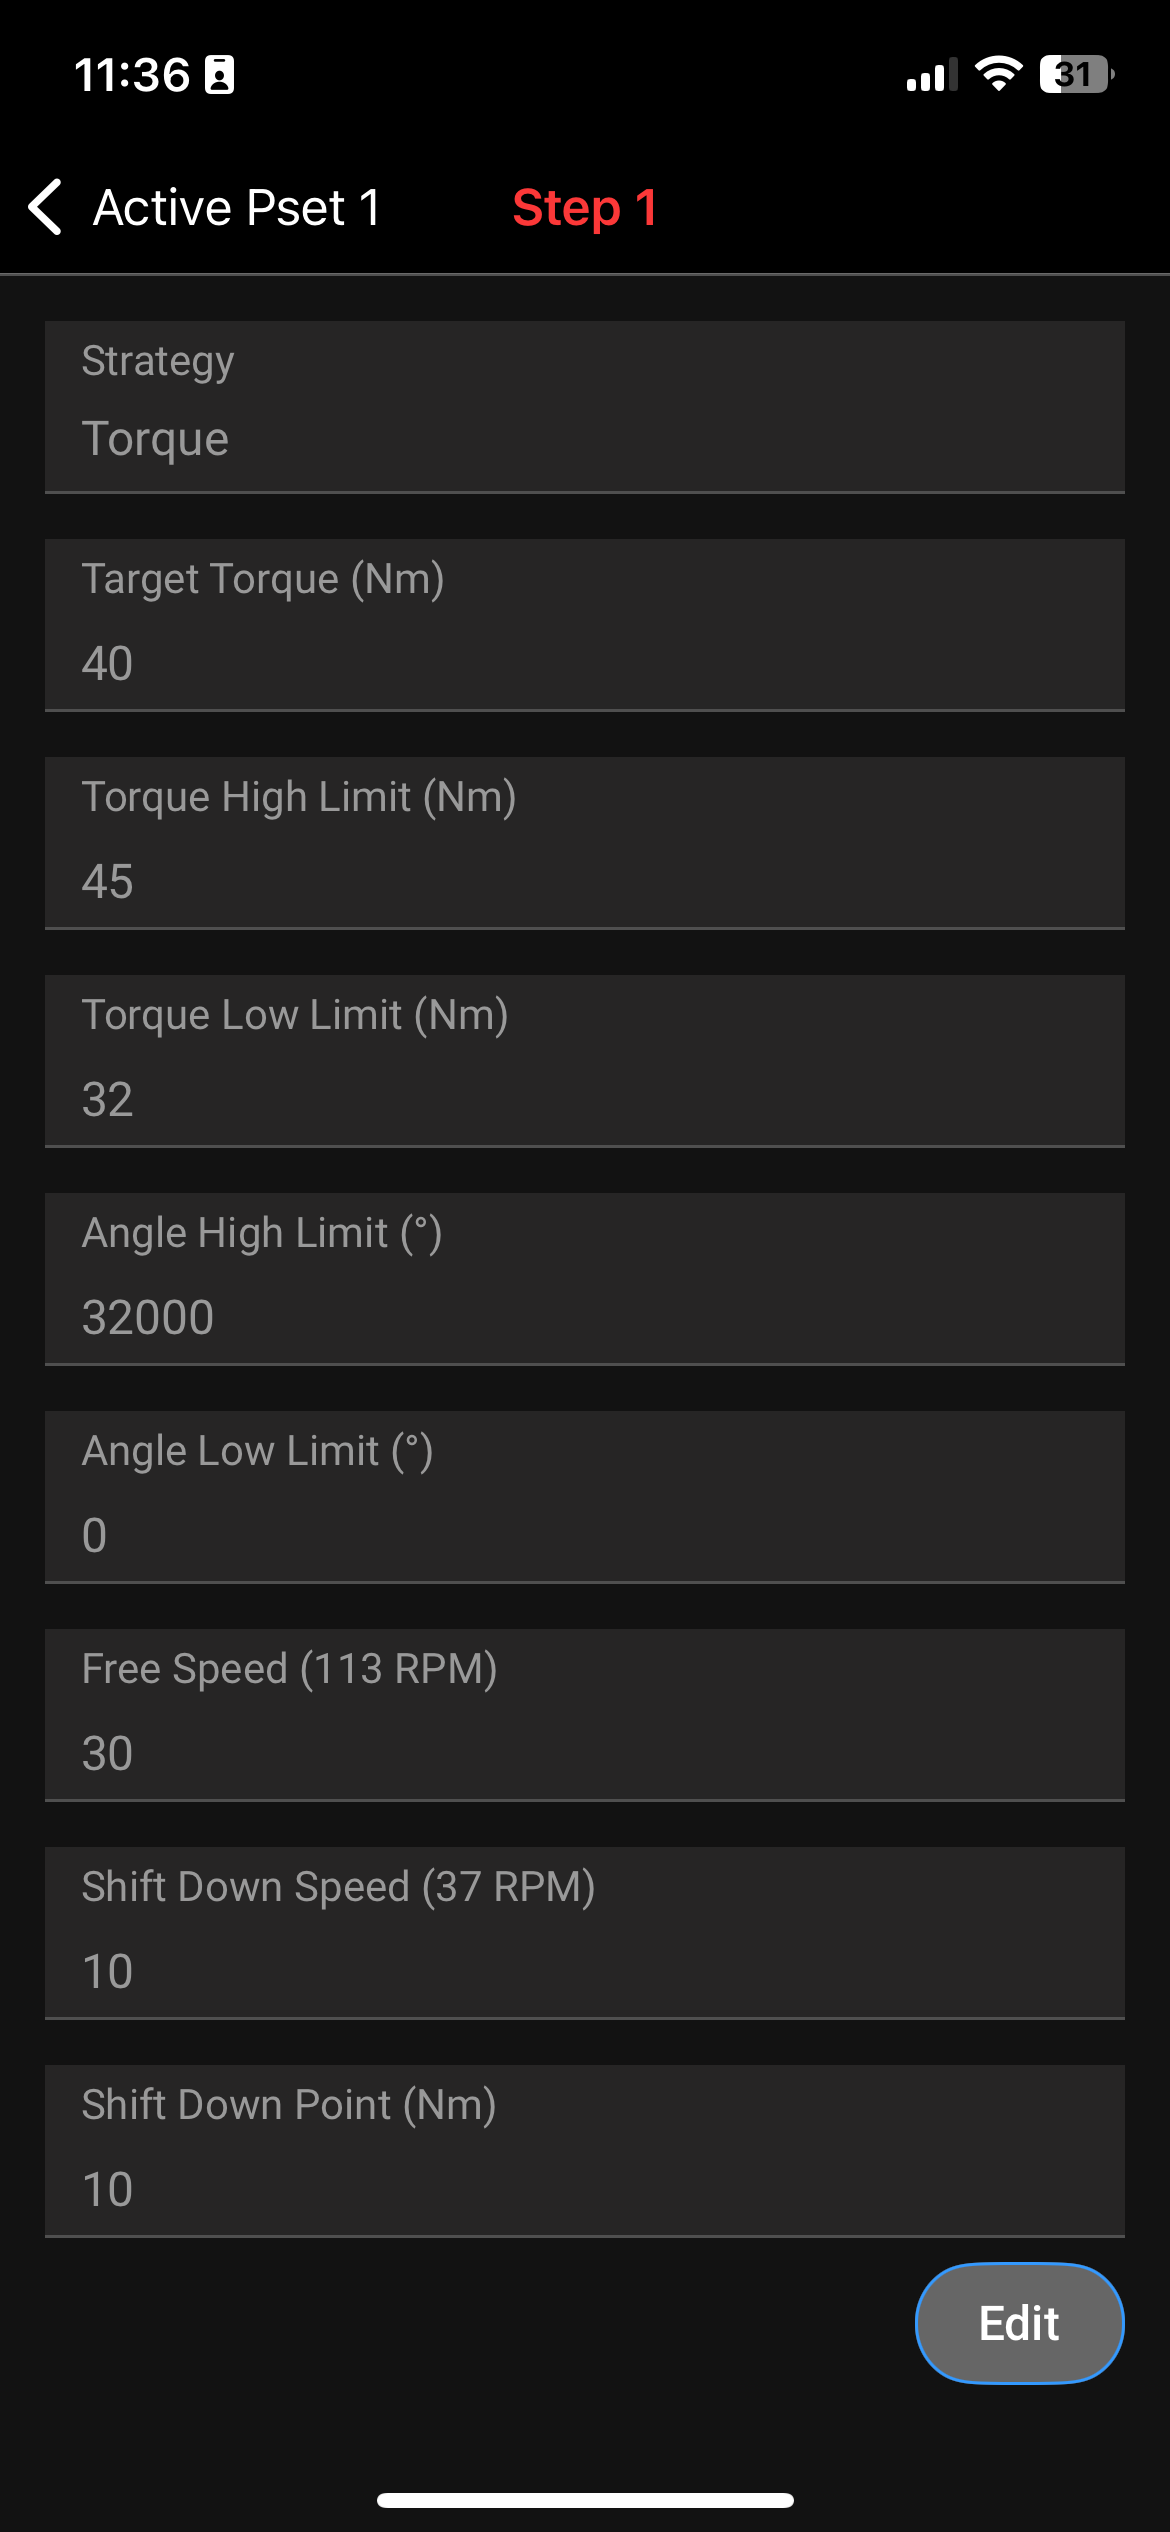
Example for 40 Nm (Reliance Base)
Example 25 Nm (Eurobase)
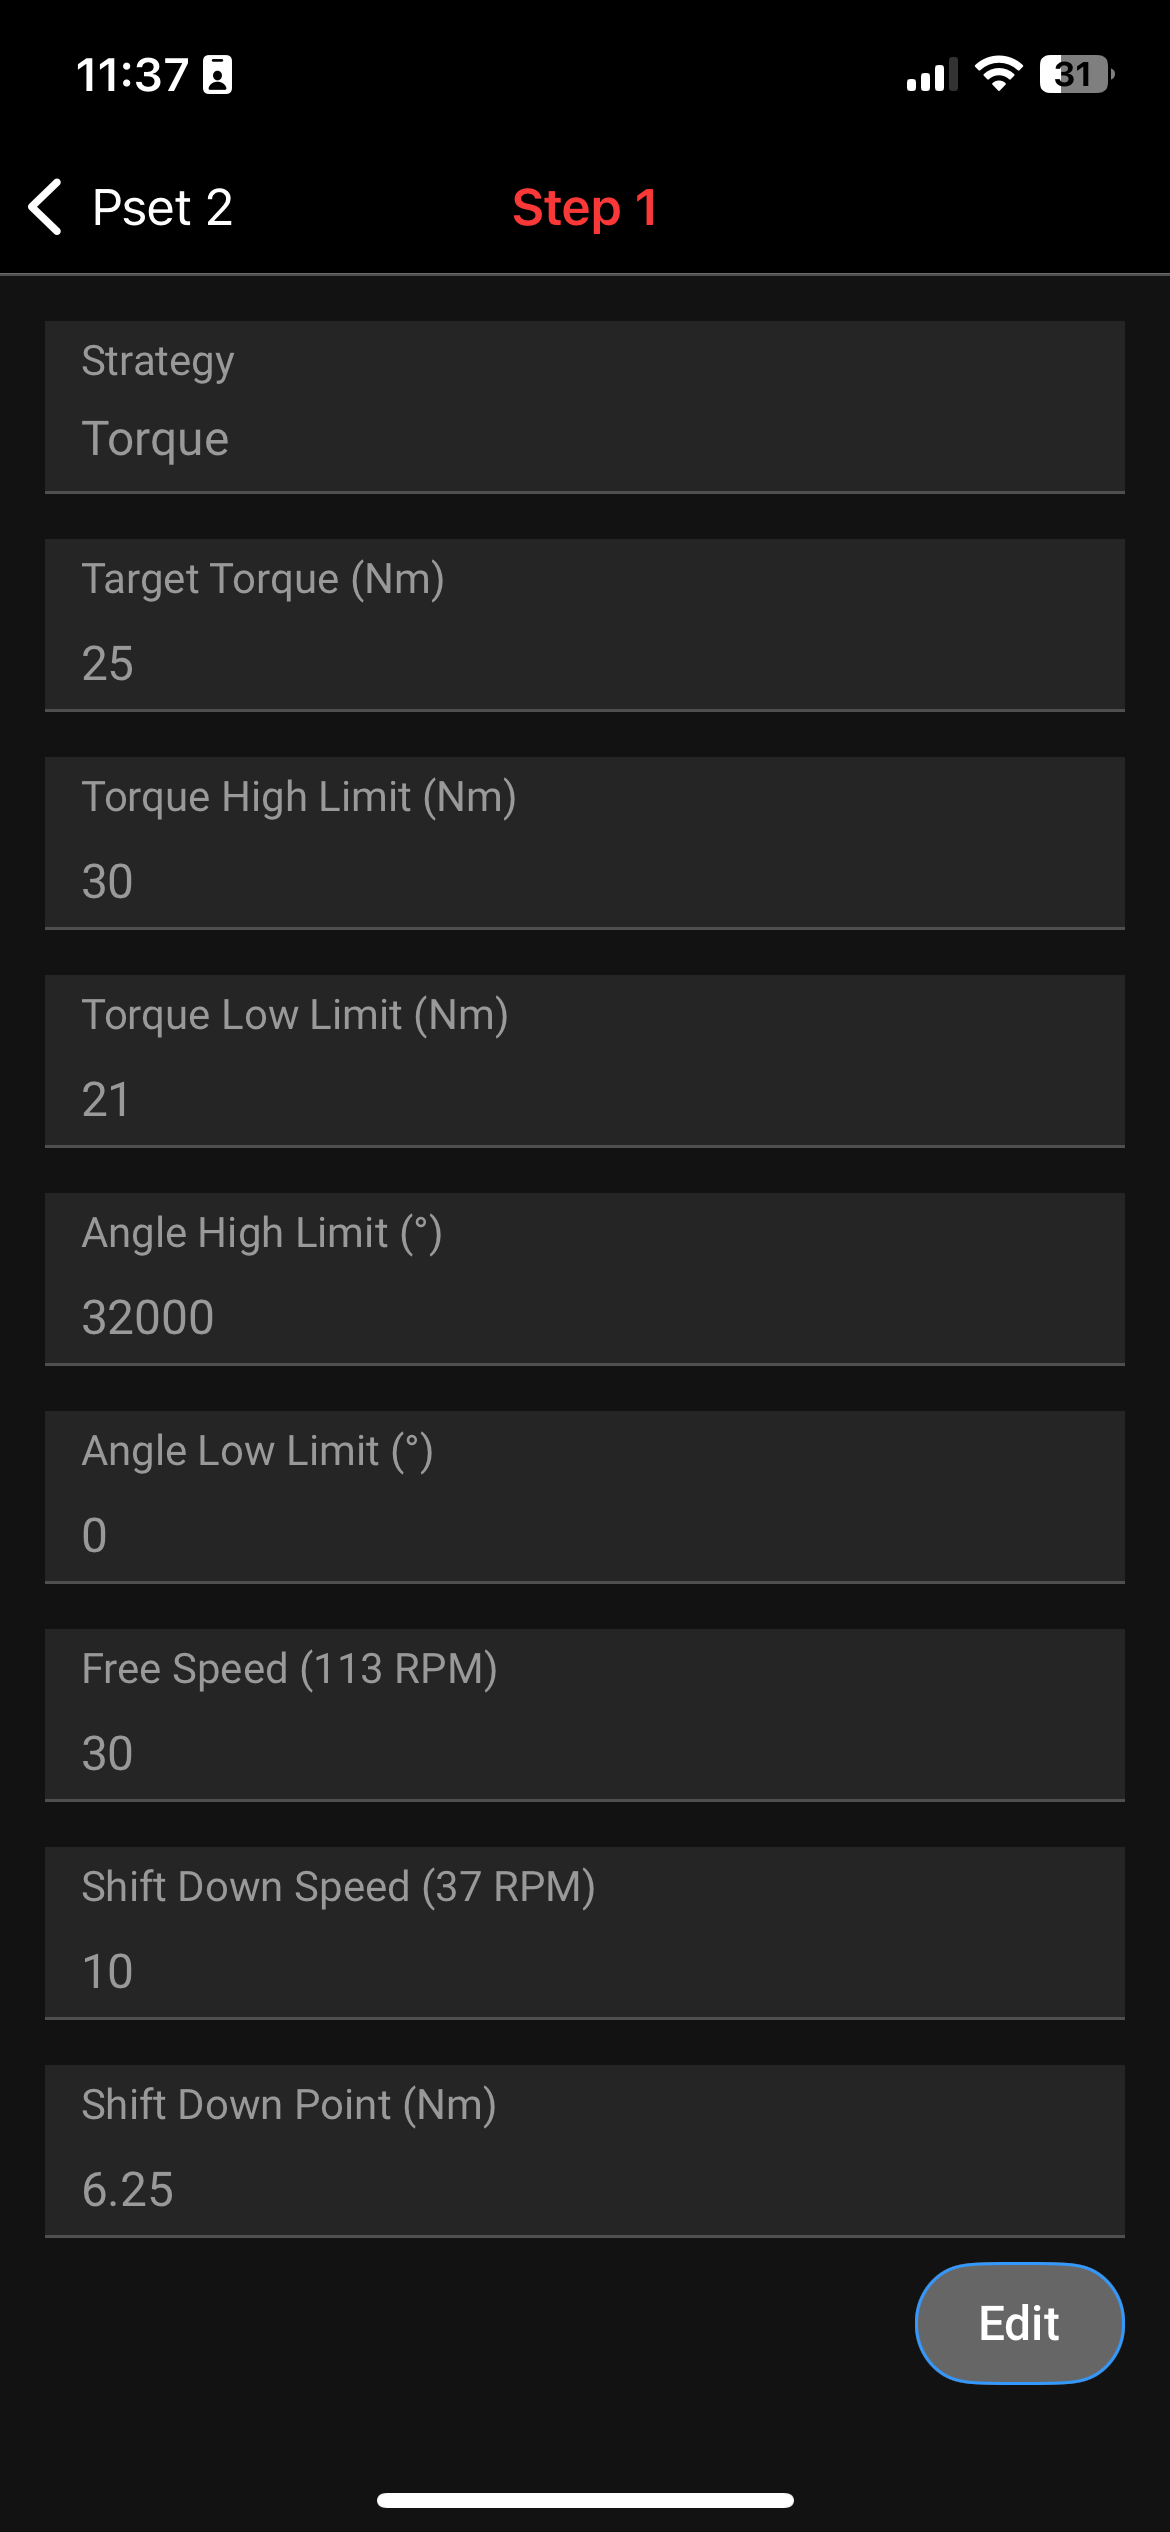
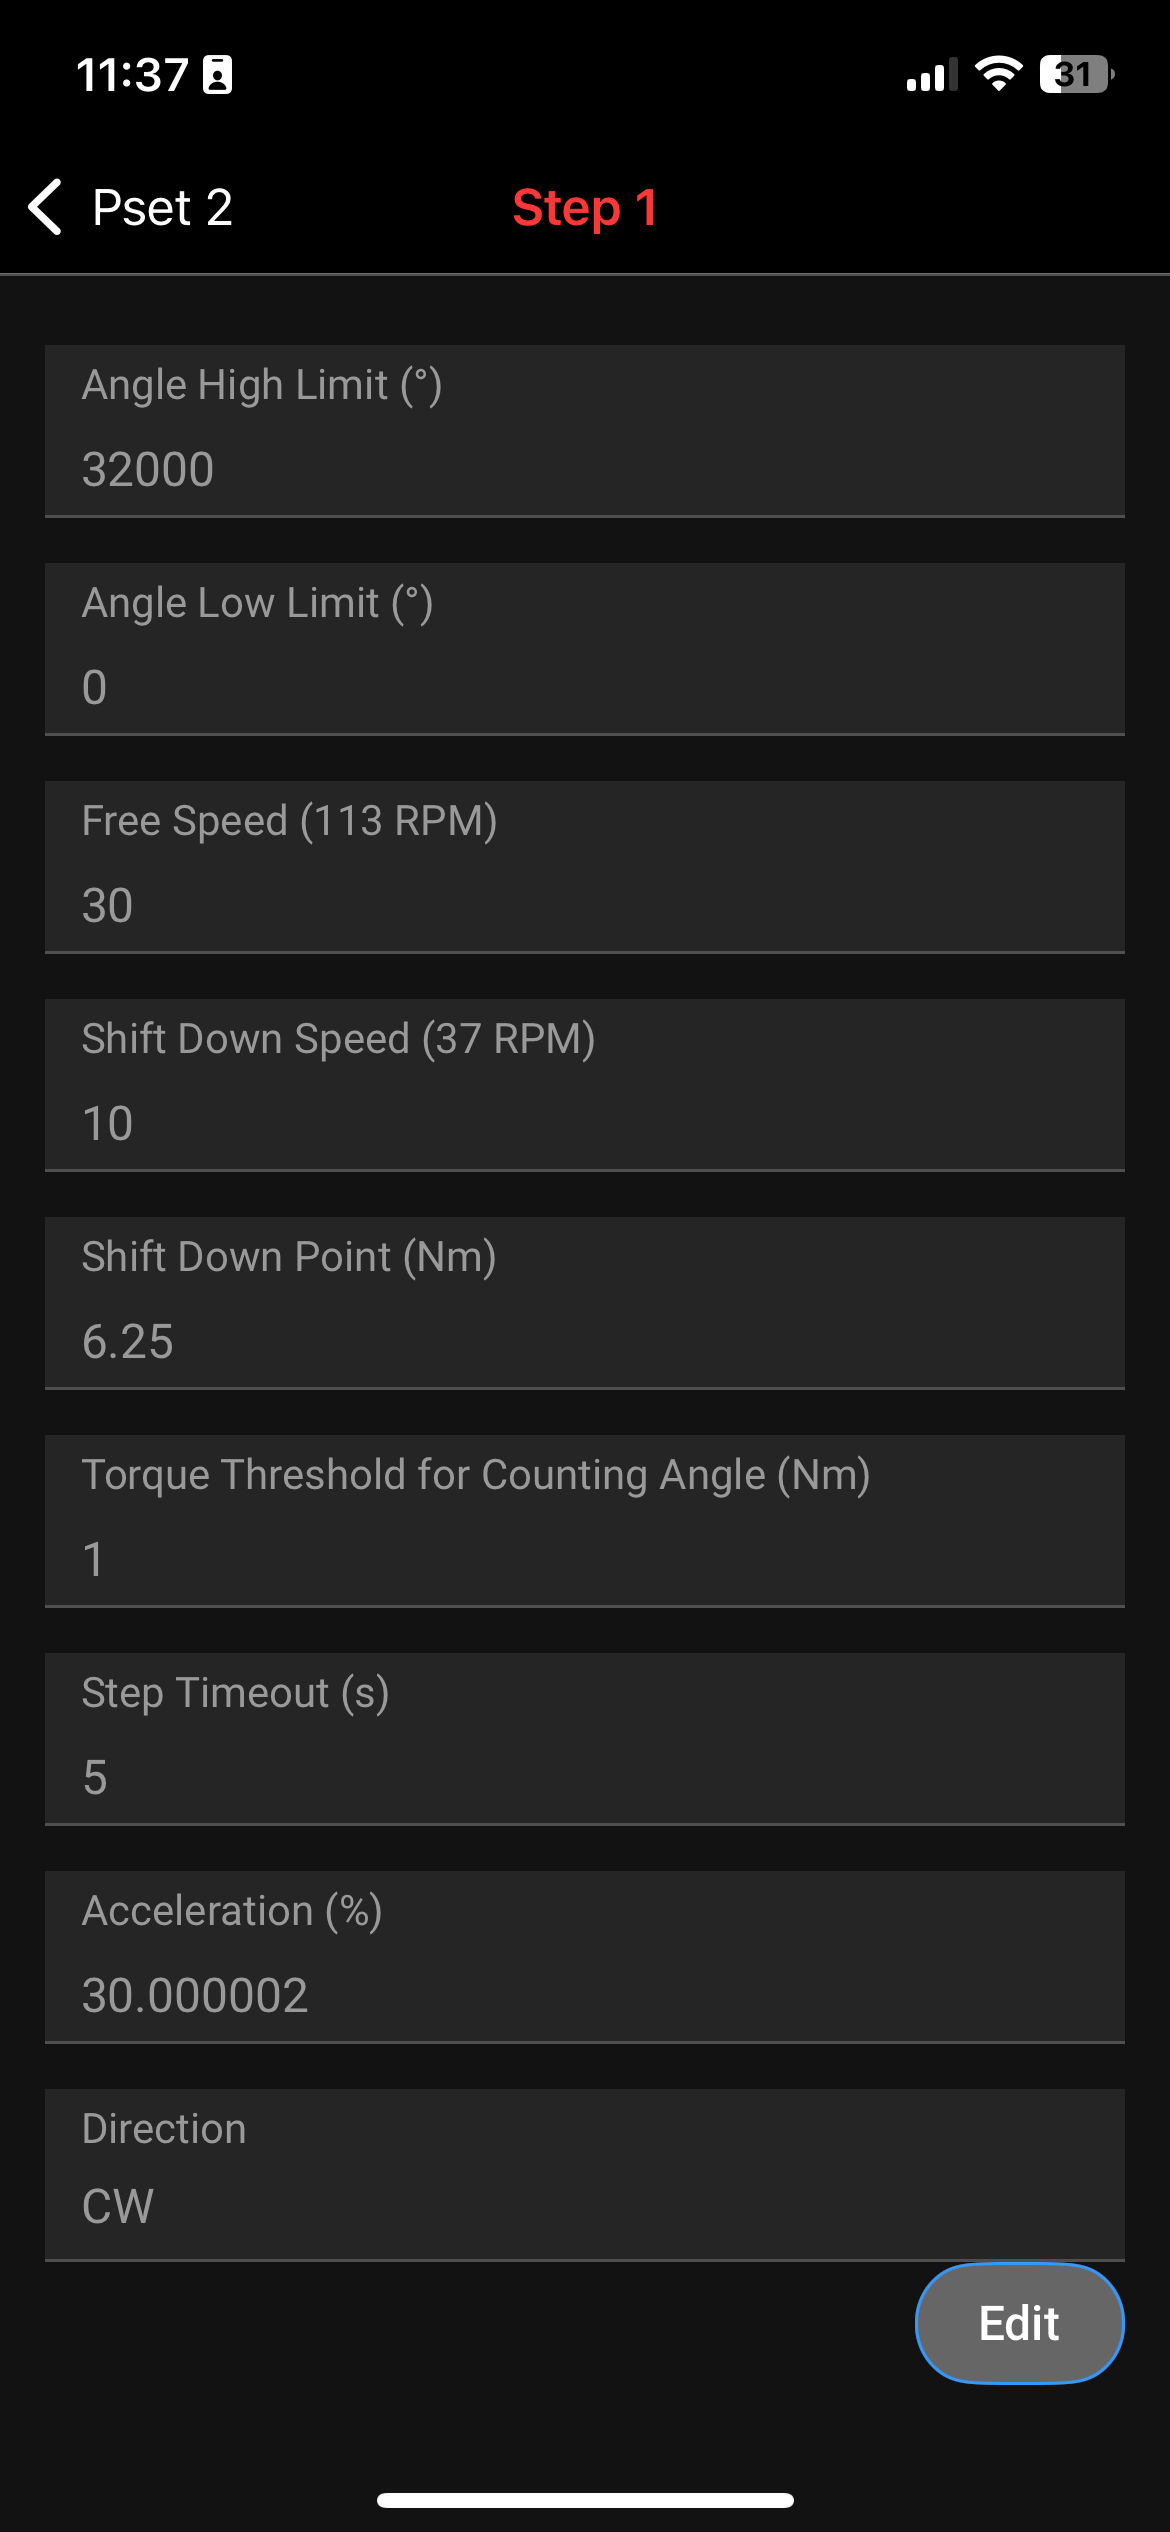
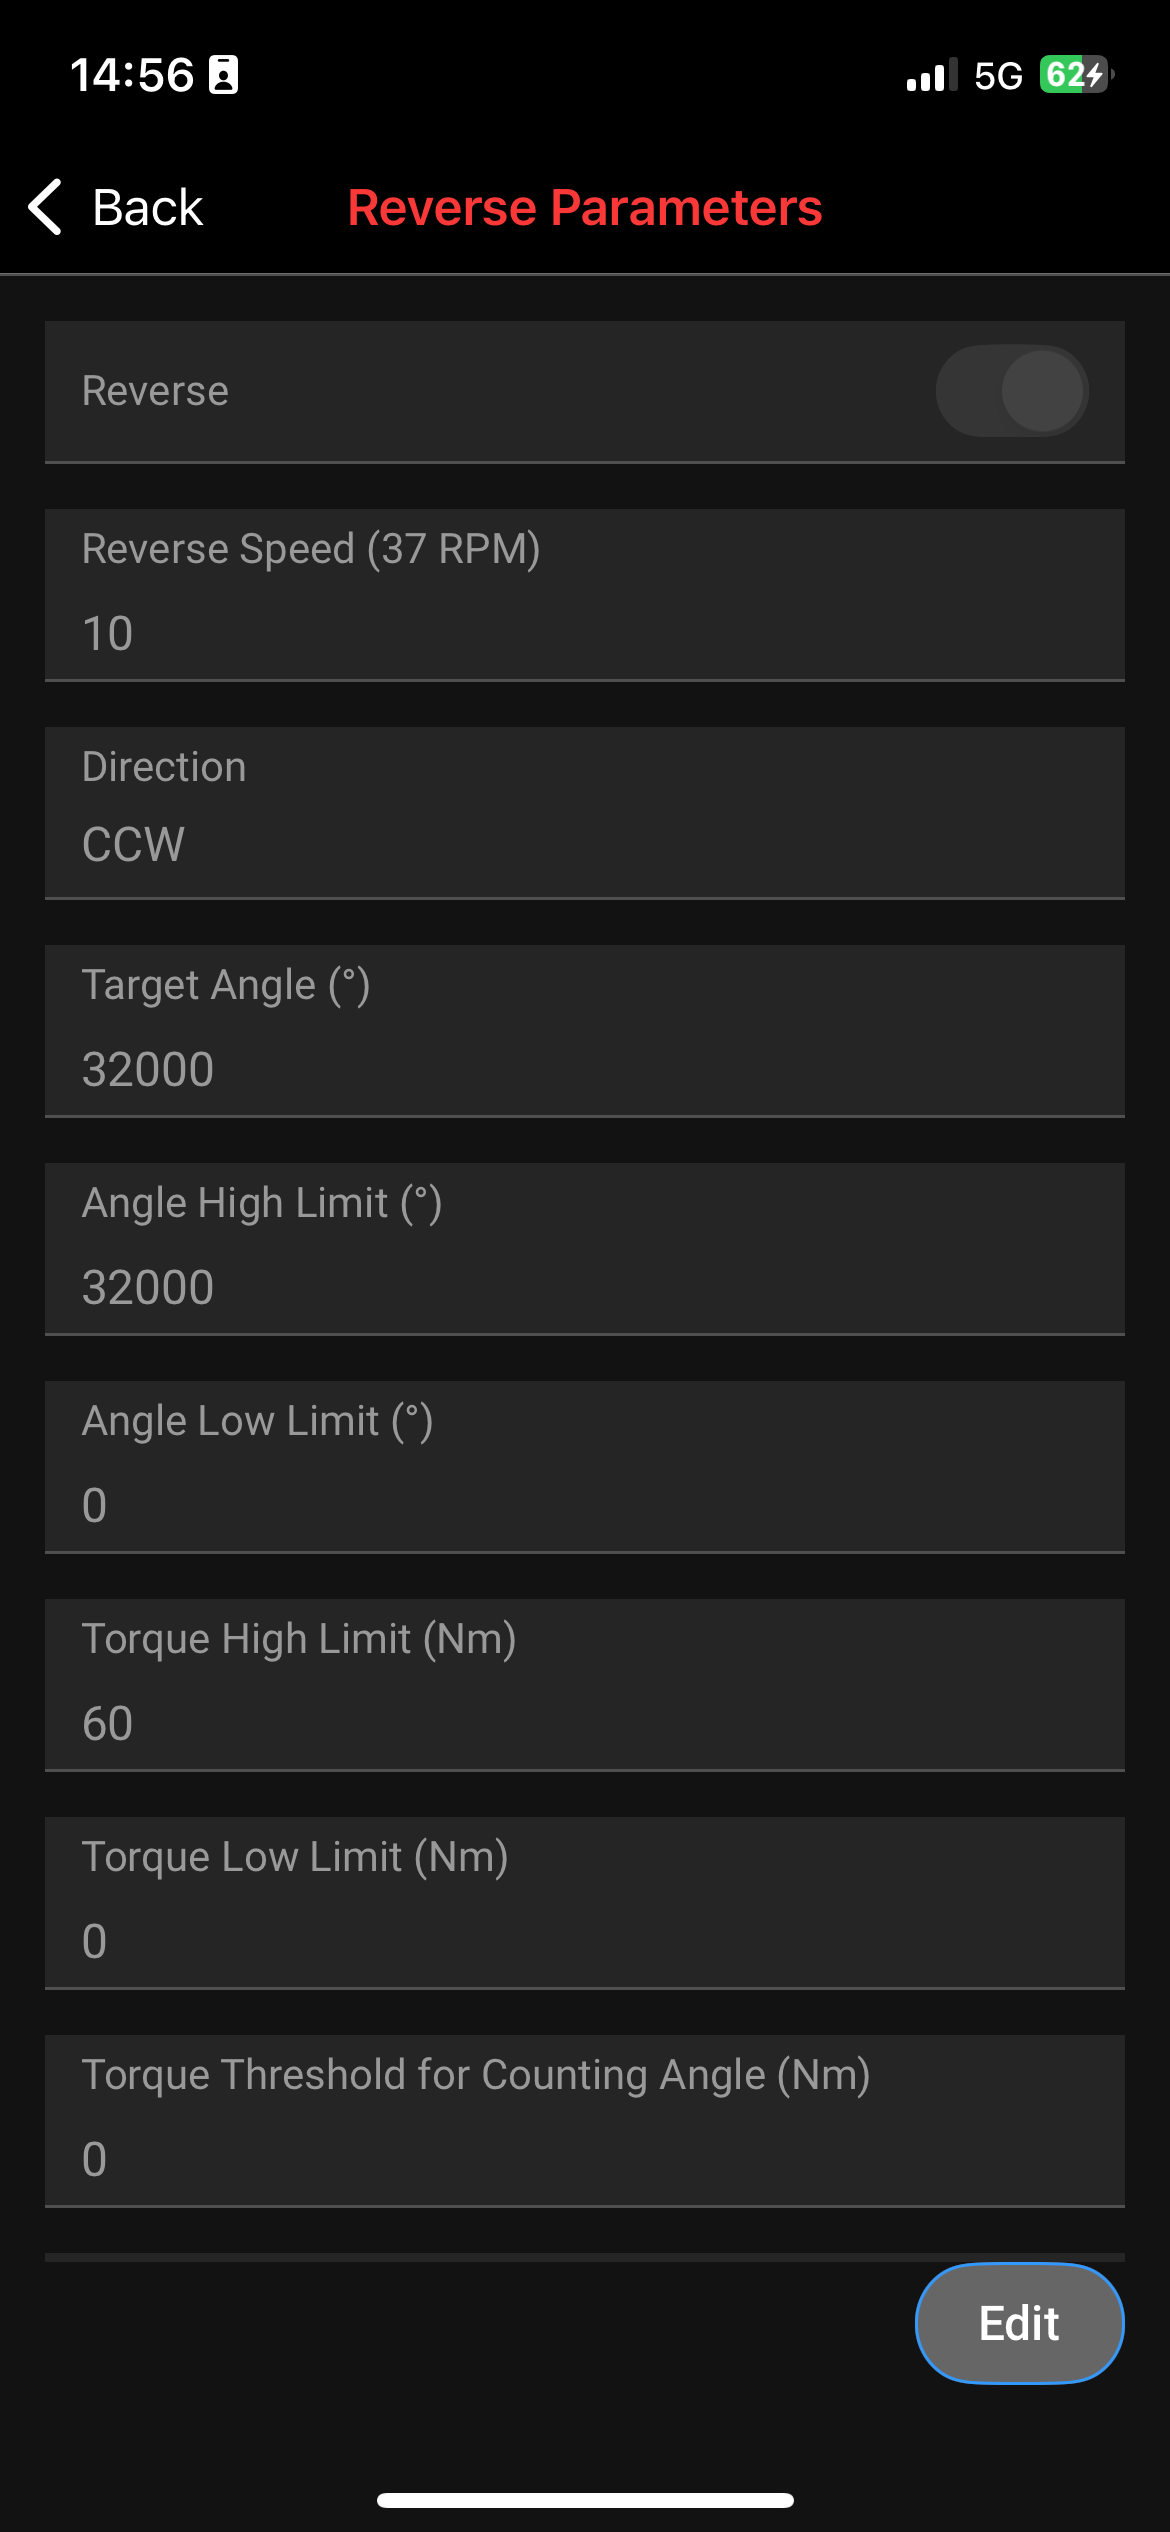
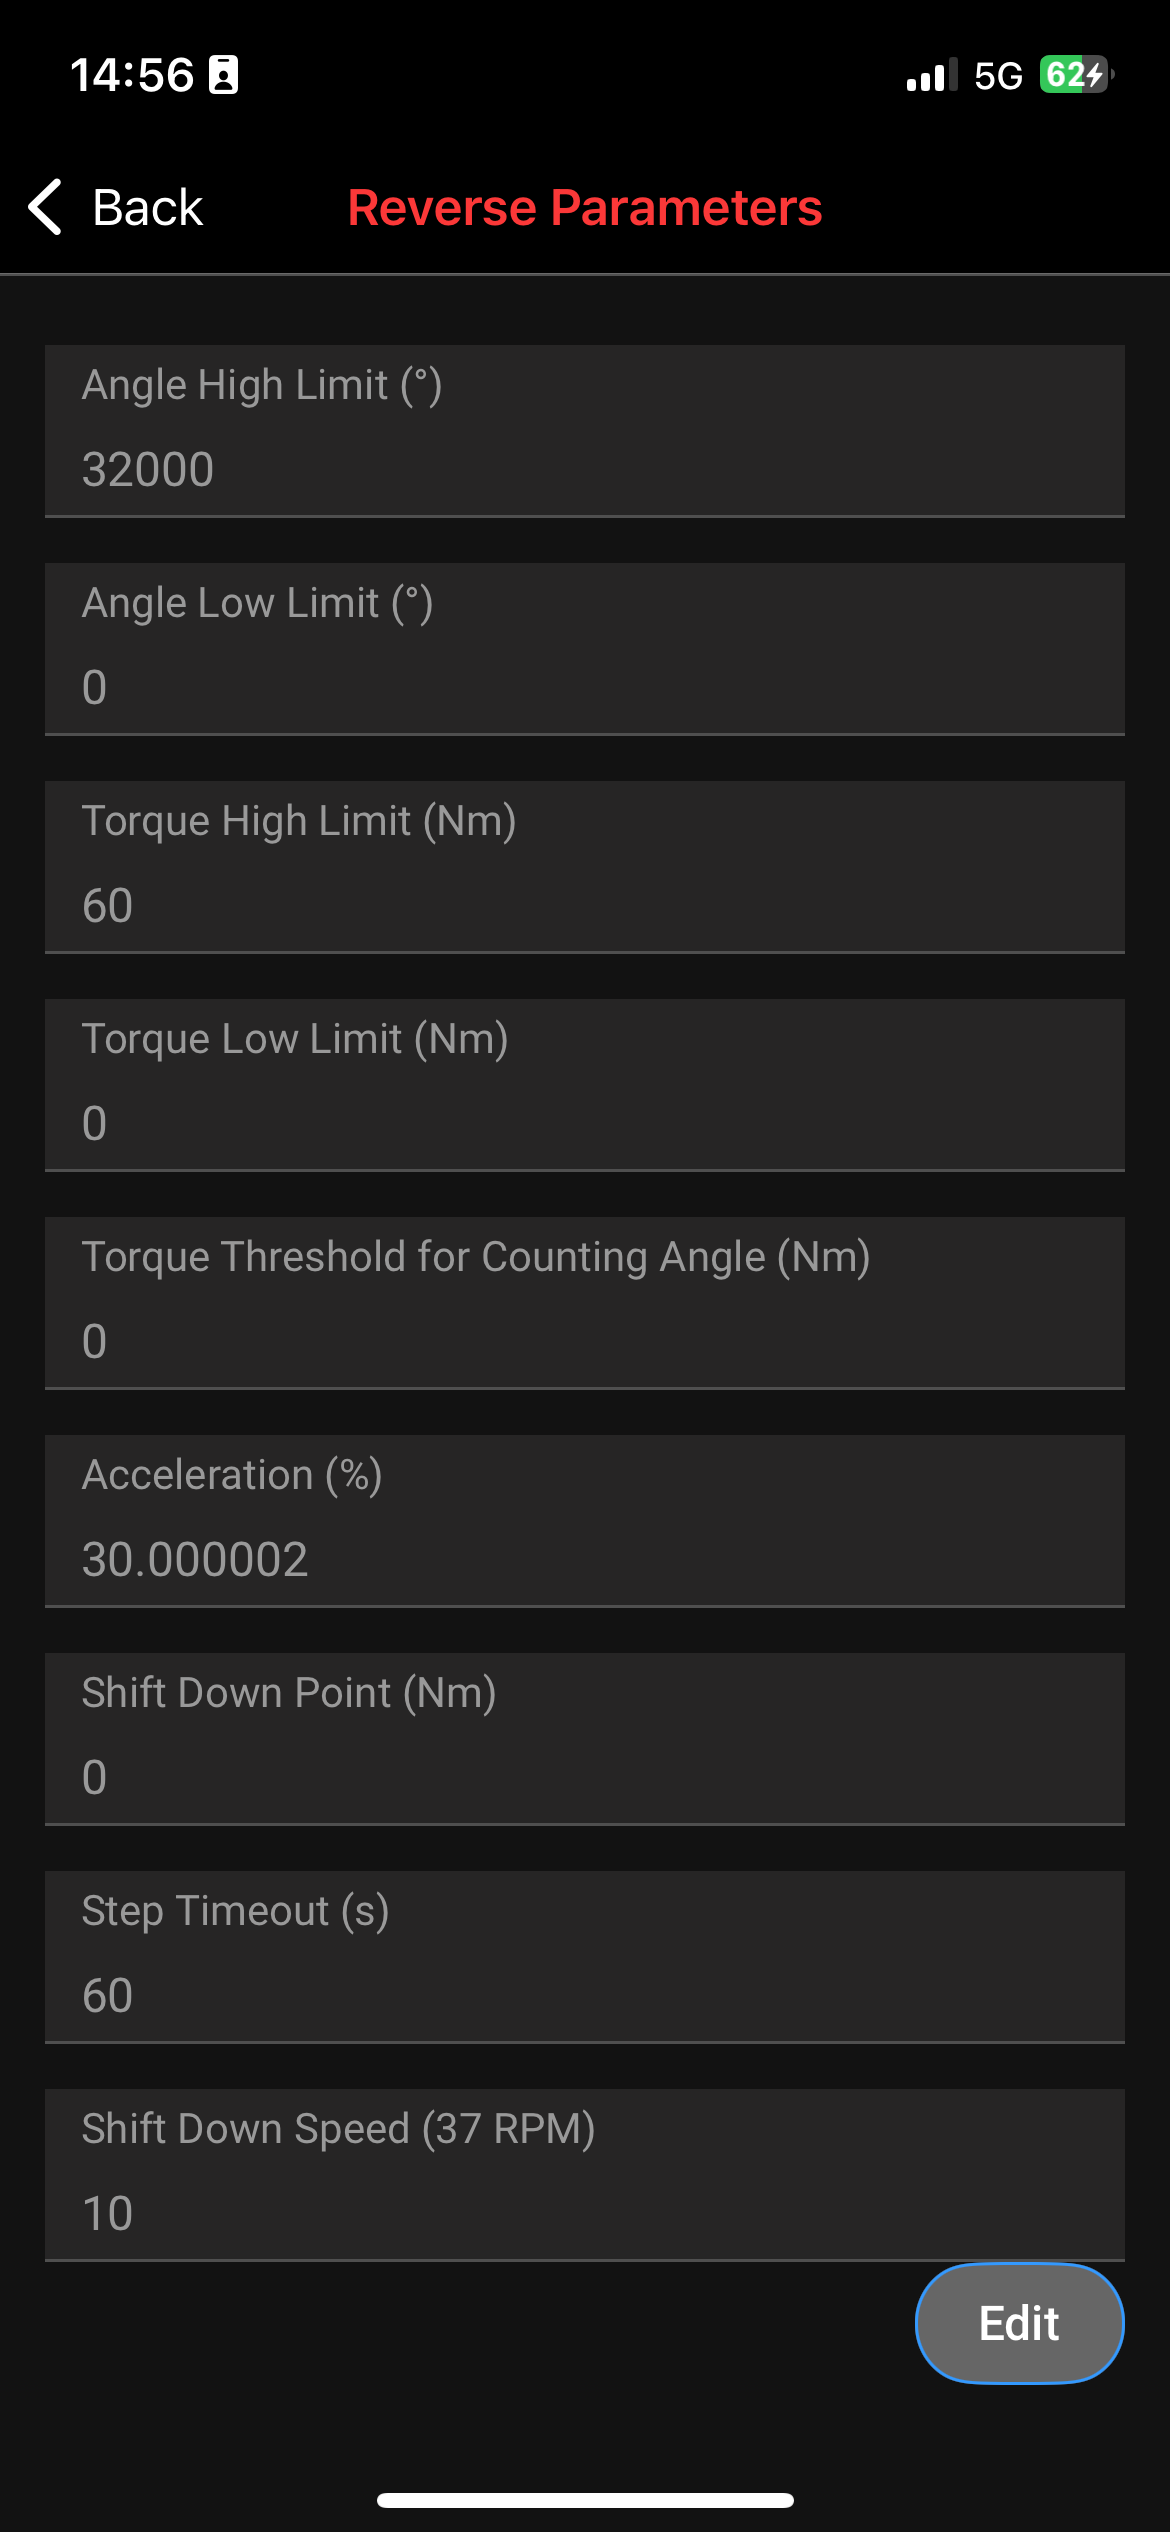
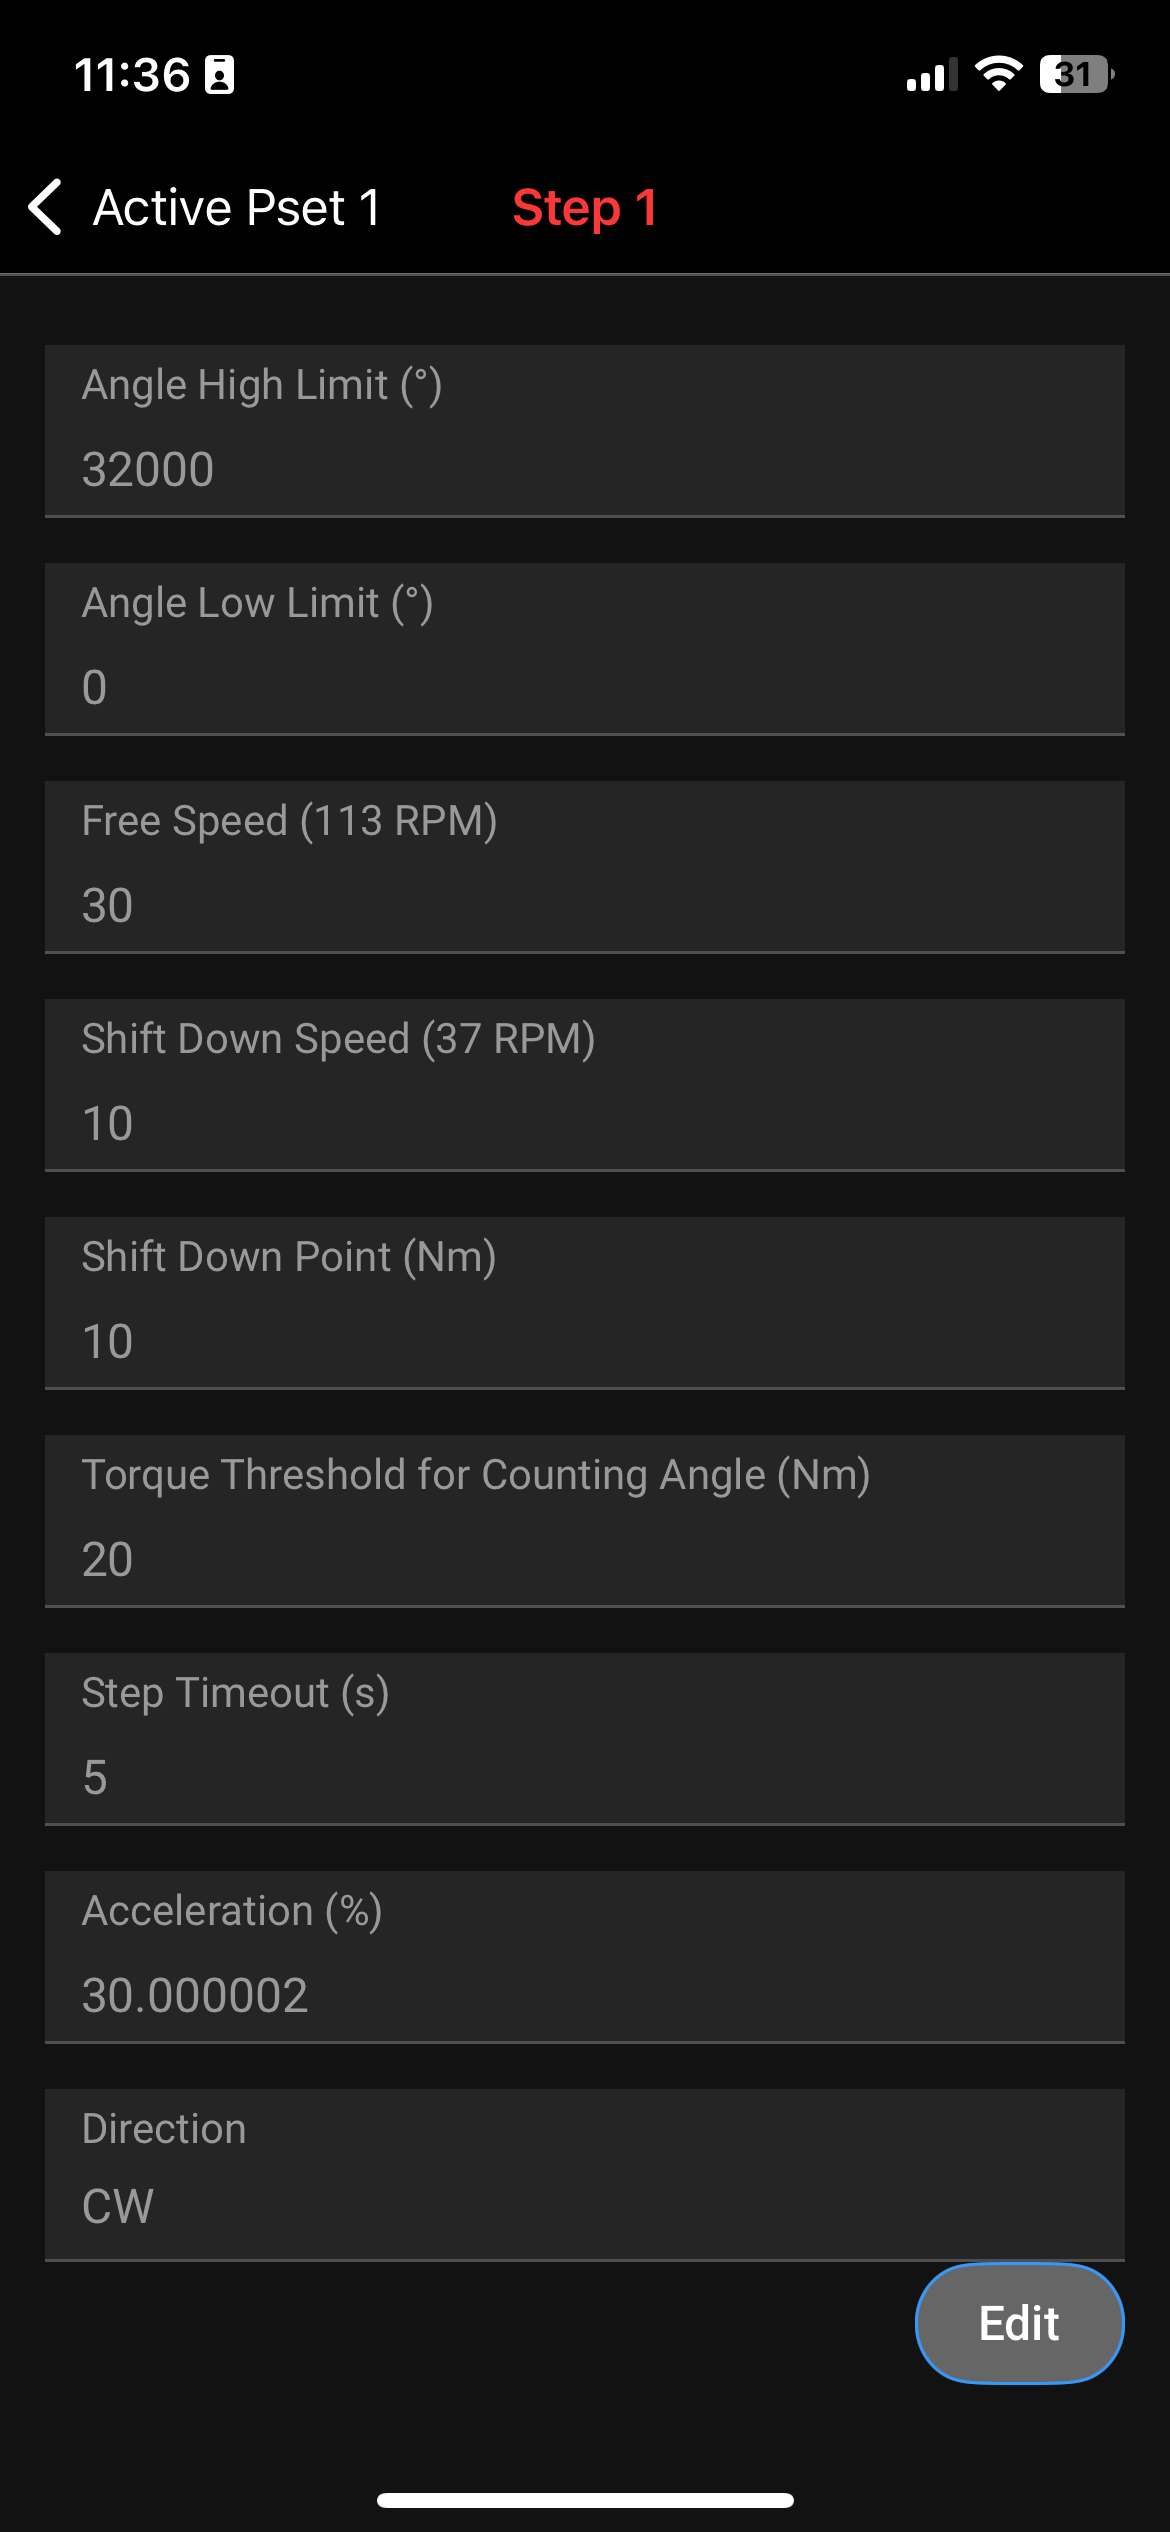
We suggest the following settings overall (normal and reverse) .
Acceleration to be 30%
Free speed to be about 20% (75 RPM ) (do not exceed 150RPM)
Shift down point to be about 25% of target torque
Shift down speed to be 10% (35 RPM)
If you have an “ETS” wrench we find “performance” to be the best result
![]() Example Config that can be loaded through the Ingersoll App :
Example Config that can be loaded through the Ingersoll App :
40 Nm
QXX-SP23L-05142510 BRU 1-step.cfg
25 Nm : QXX-SP24F-051425153024 1 step 25 Nm.cfg
Changing to different psets
You might want to have different psets if you have different bases that require different torque values. From the app, you can edit/add a new pset. In total, you can have up to 32 psets.
Change active pset from the app:
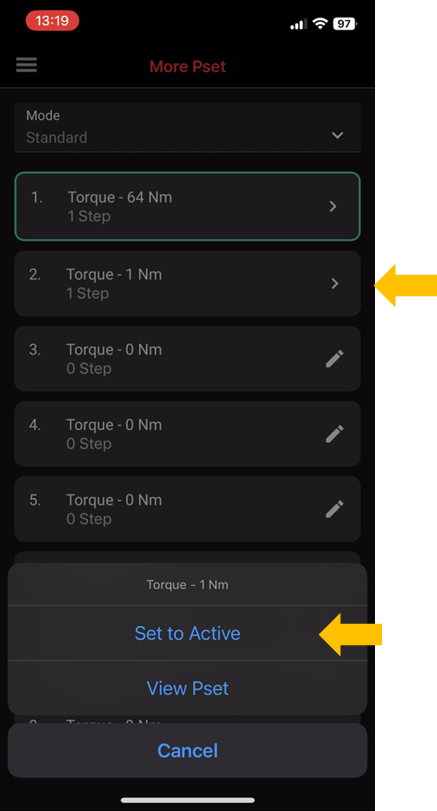
Pro tip: doing this on-site might not be convenience, try changing the pset directly from the wrench!
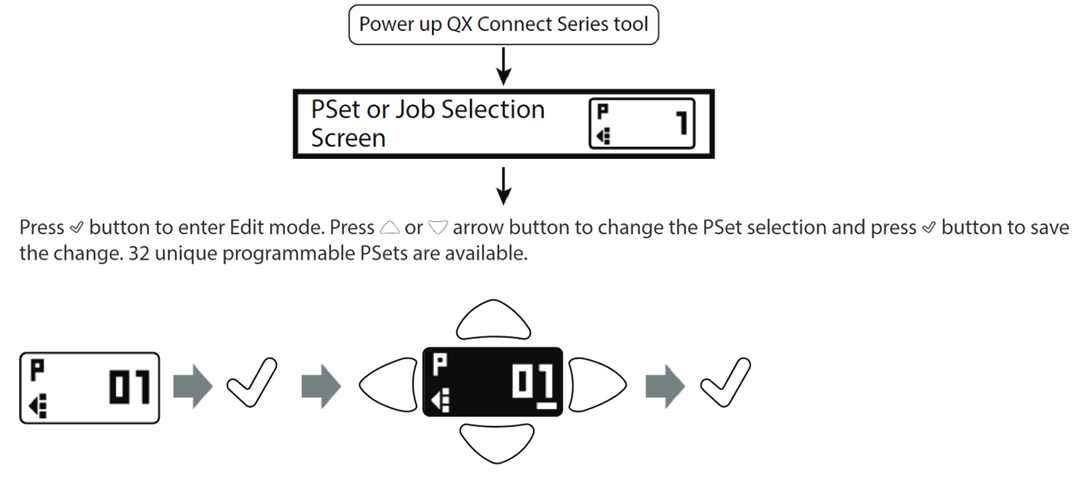
Change active pset on the wrench:
By default, the wrench will make pset1 active.
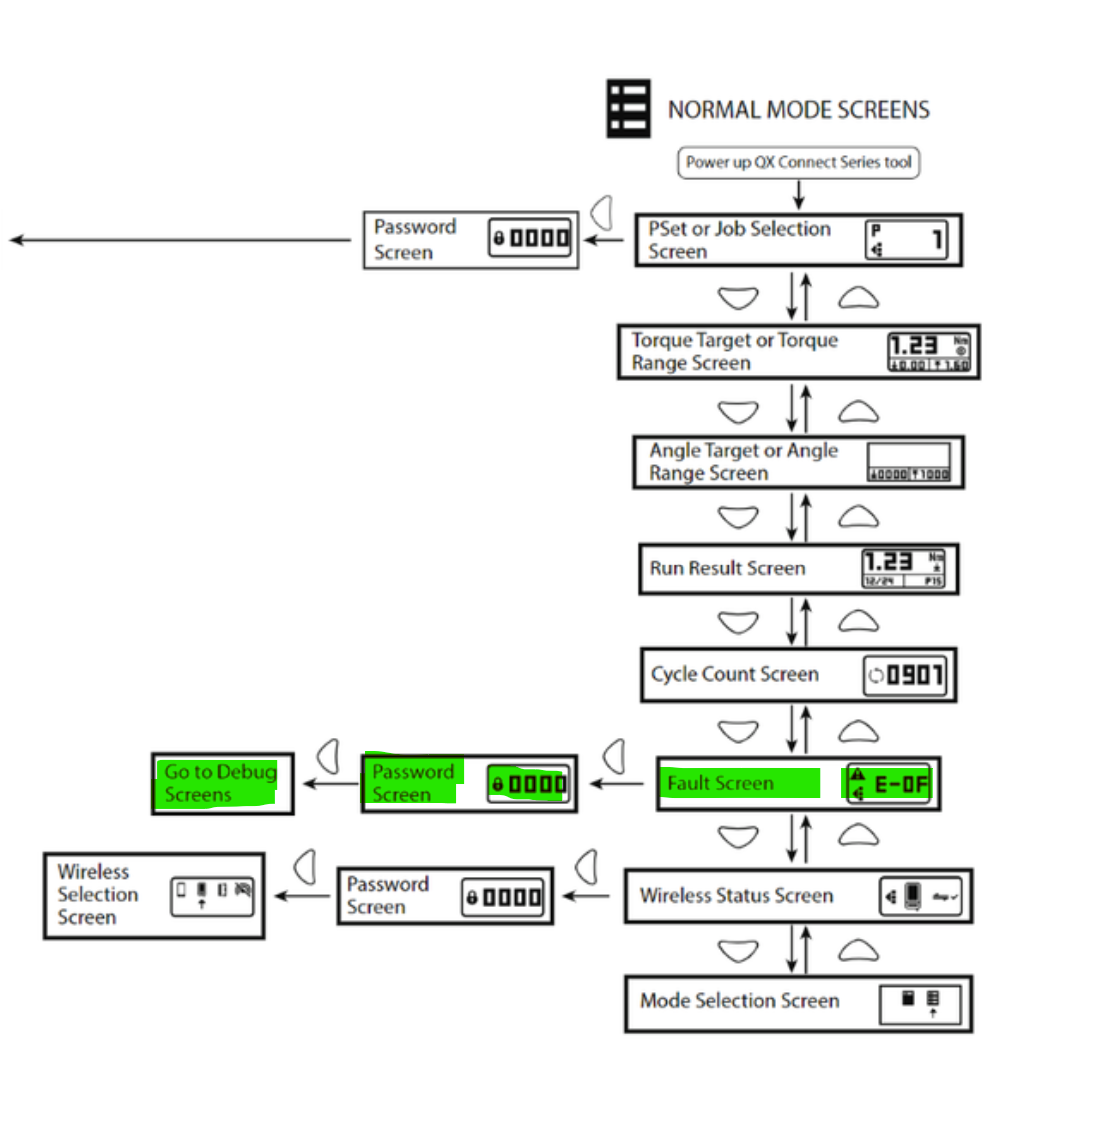
To change to different psets from the wrench, you have to navigate to this screen. (Tip: you can use the up-down buttons to get to this screen, see FAQ for more screen explanation)
Go to the ALIS Web Application and go to Settings > Maintenance Torque Settings
* Set your LOW Default and HIGH Limits similar as in the wrench
* Optional - Set/Modify your Initial torque conditions as in How-to Determine the initial torque categoriesYou can now connect the wrench to the ALIS app and start your torque maintenance.
![]() Remark: ALIS and the INSIGHTConnect app cannot be used at the same time
Remark: ALIS and the INSIGHTConnect app cannot be used at the same time
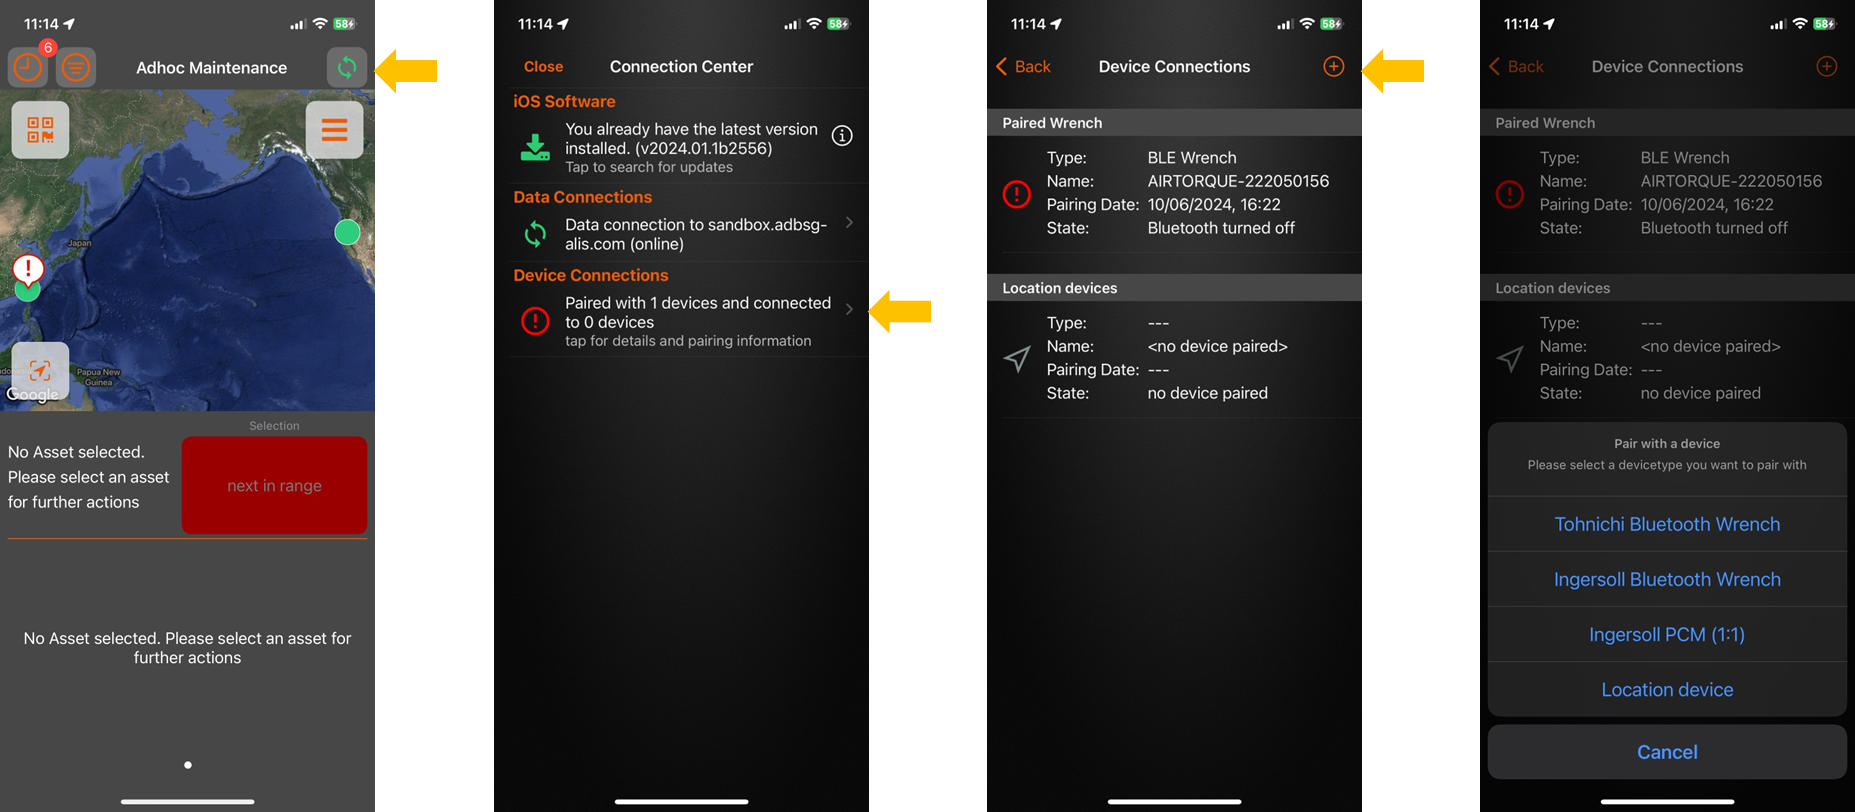
log into ALIS → Connection Center → ![]() → Ingersoll Wrench
→ Ingersoll Wrench
See ALIS Hardware - First time use for more details.
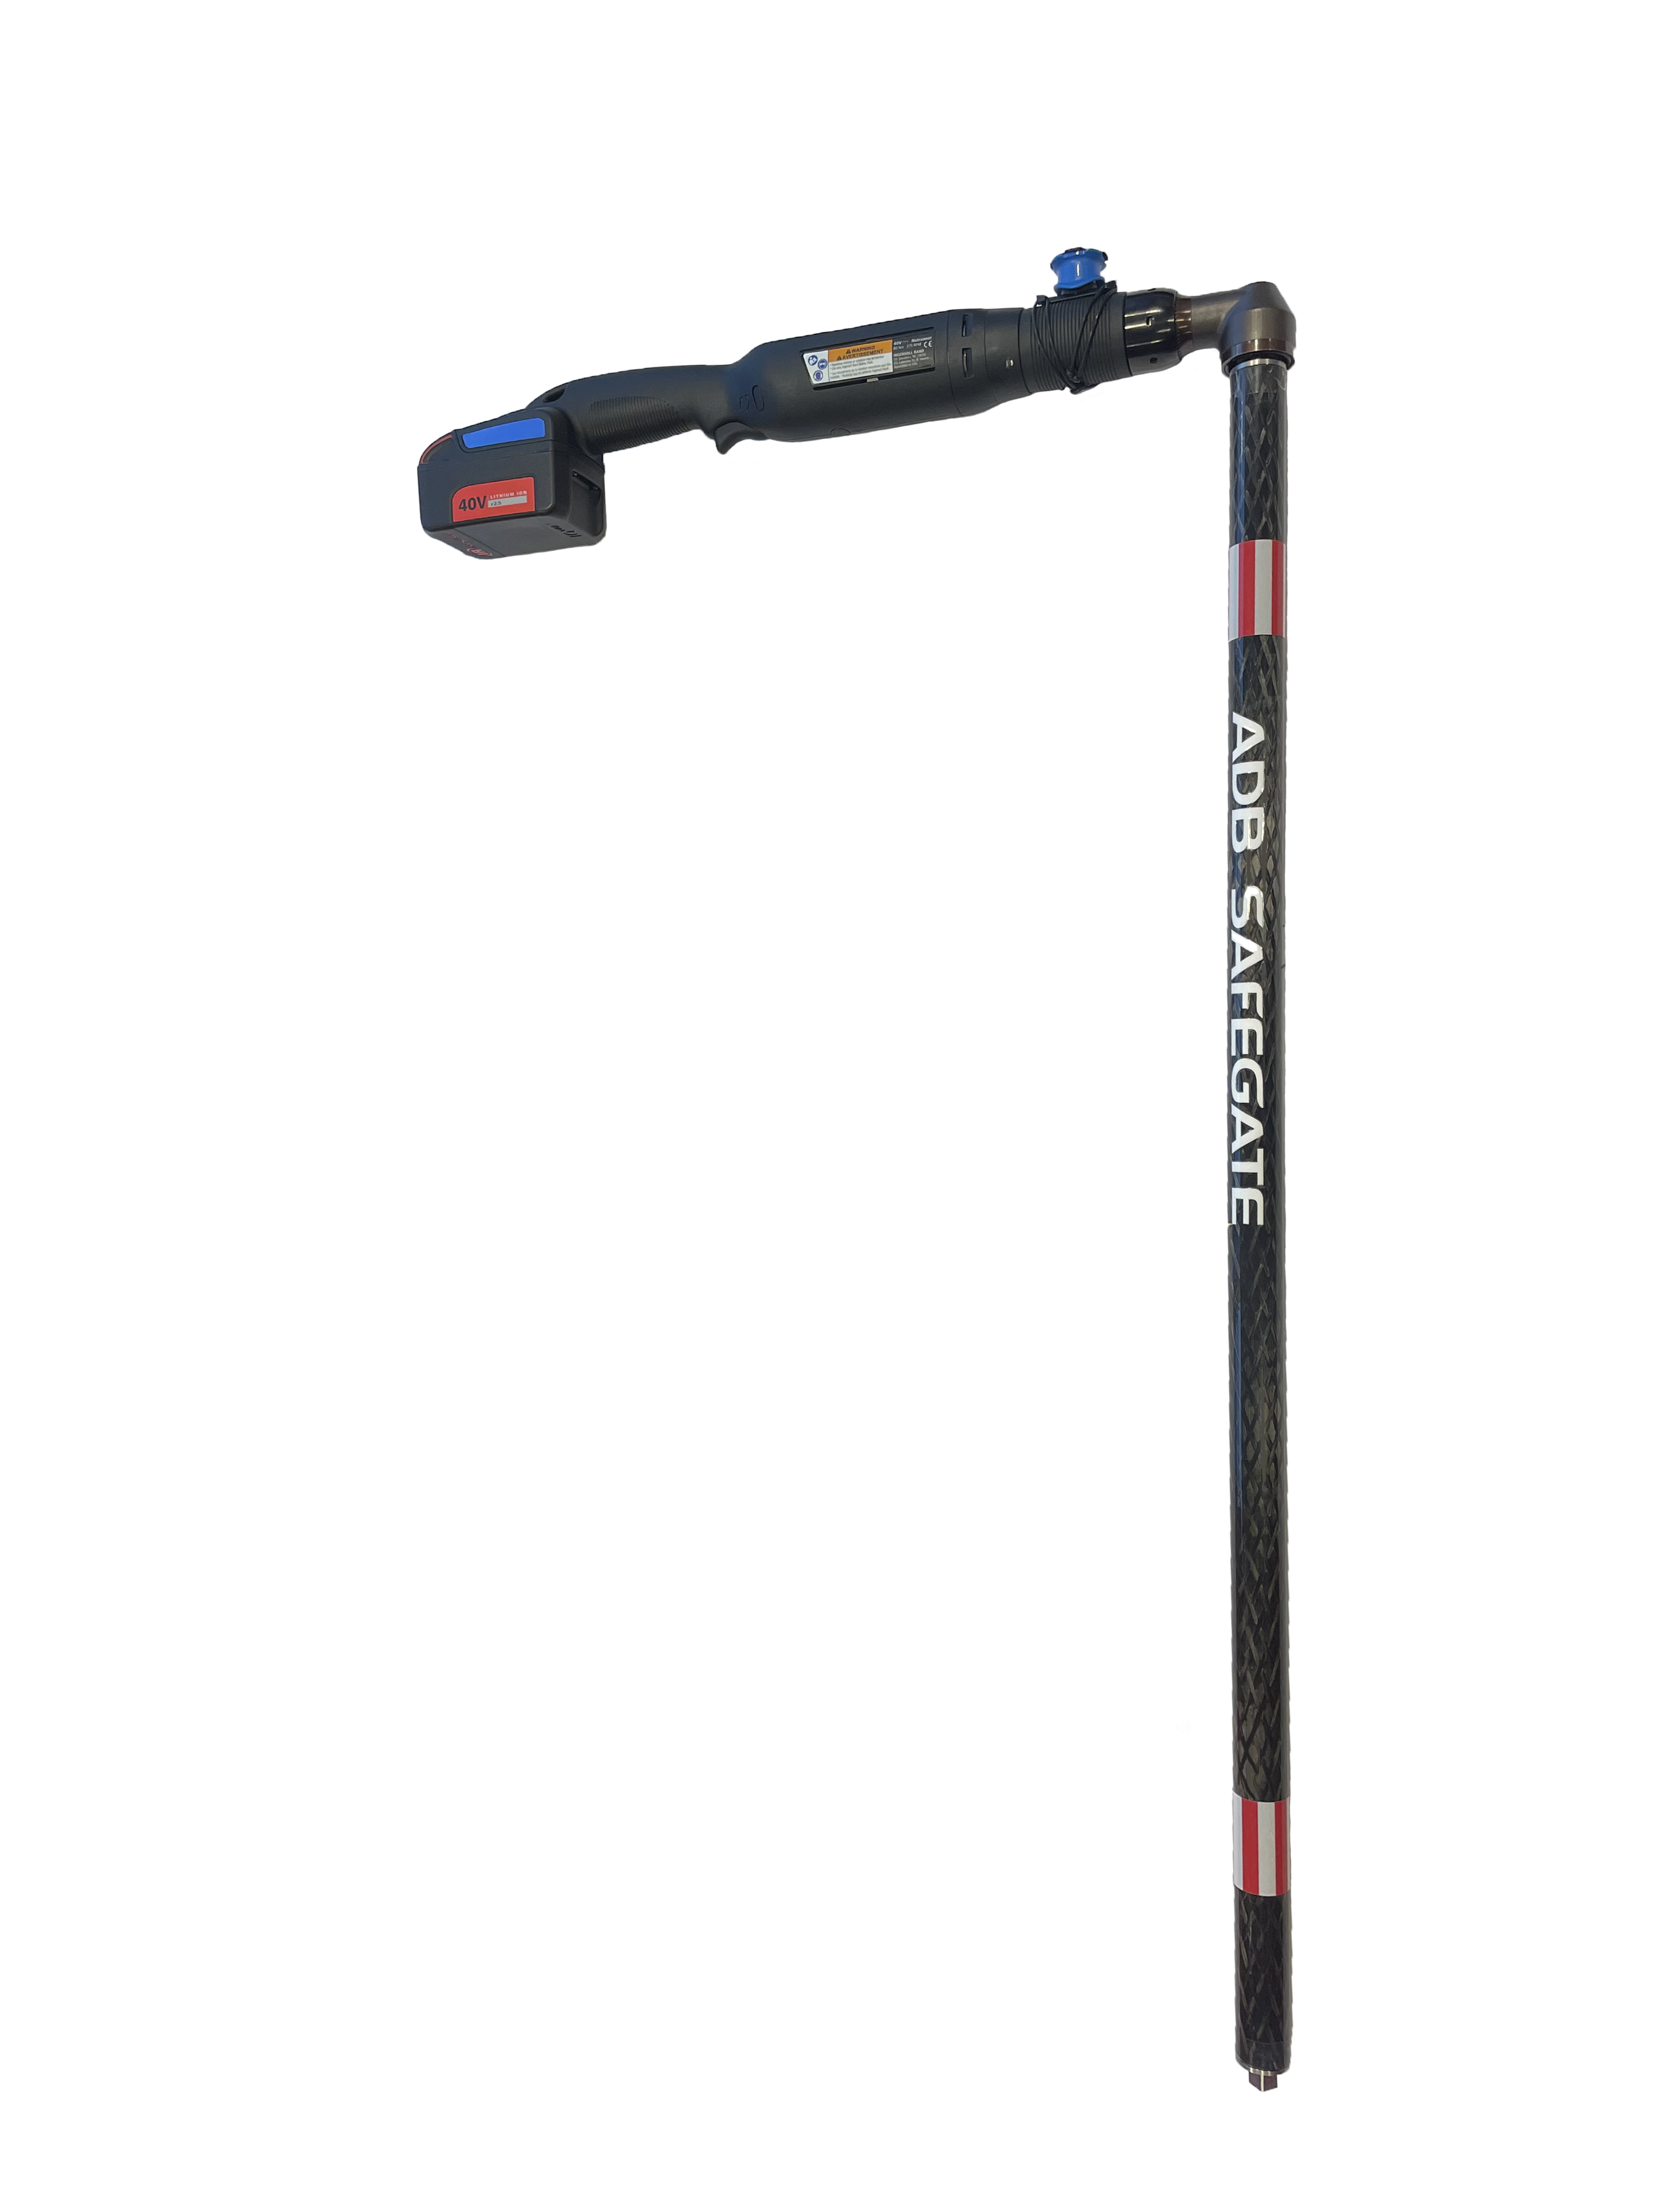
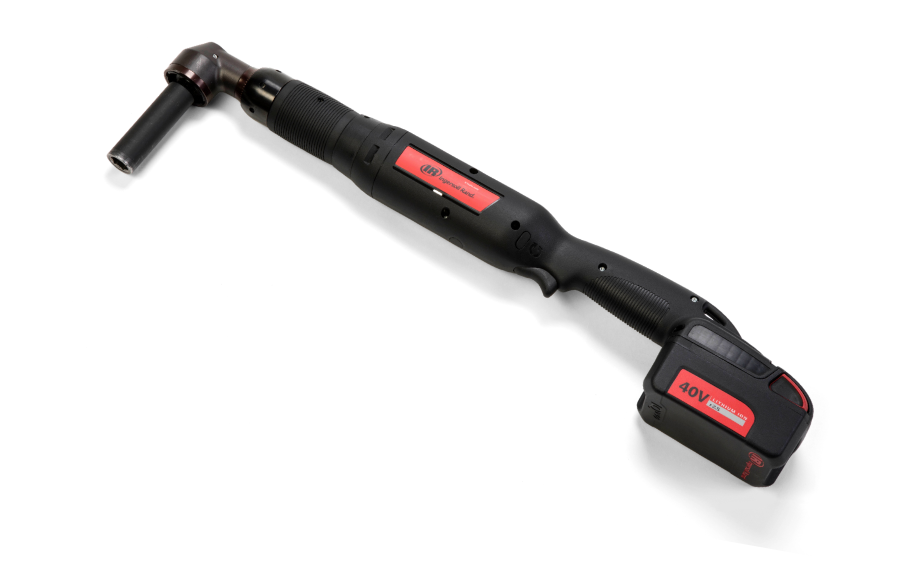
Don’t forget to connect the wrench to the extension bar!
FAQ and common errors
If you prefer to first untighten the bolt and then re-tighten the bolt to make sure you are tightening in the “dynamic” range and that your bolt is not stuck, then you can setup a 3 step torque proces.
Have a look at the video below ( you can pause when desired) to see the settings in order to setup this process
Want to see it in live action? have a look at this Slow-mo video below where we perform this on a tightened light and once more when we first untighten the bolt with the reverse mode. ![]() Note , the “shocking” you see is due to the ETS -ergonomic function - this is NOT the same as an impact driver
Note , the “shocking” you see is due to the ETS -ergonomic function - this is NOT the same as an impact driver
You can find the config file here which you could use to “load preset” and put it on your wrench
QXX-SP23L-051425100 BRU 3 step.cfg (40 NM)
![]() it is up to the airport to decide if they want to untighten the bolt or not before torque inspection
it is up to the airport to decide if they want to untighten the bolt or not before torque inspection
ADB Safegate has manuals which give recommened values for each type of airfield lights.
Example: AXON - Runway Centerline
Download the manual
If you go to section INTEROPERABILITY of the manual, you will see the recommended values for different situations.
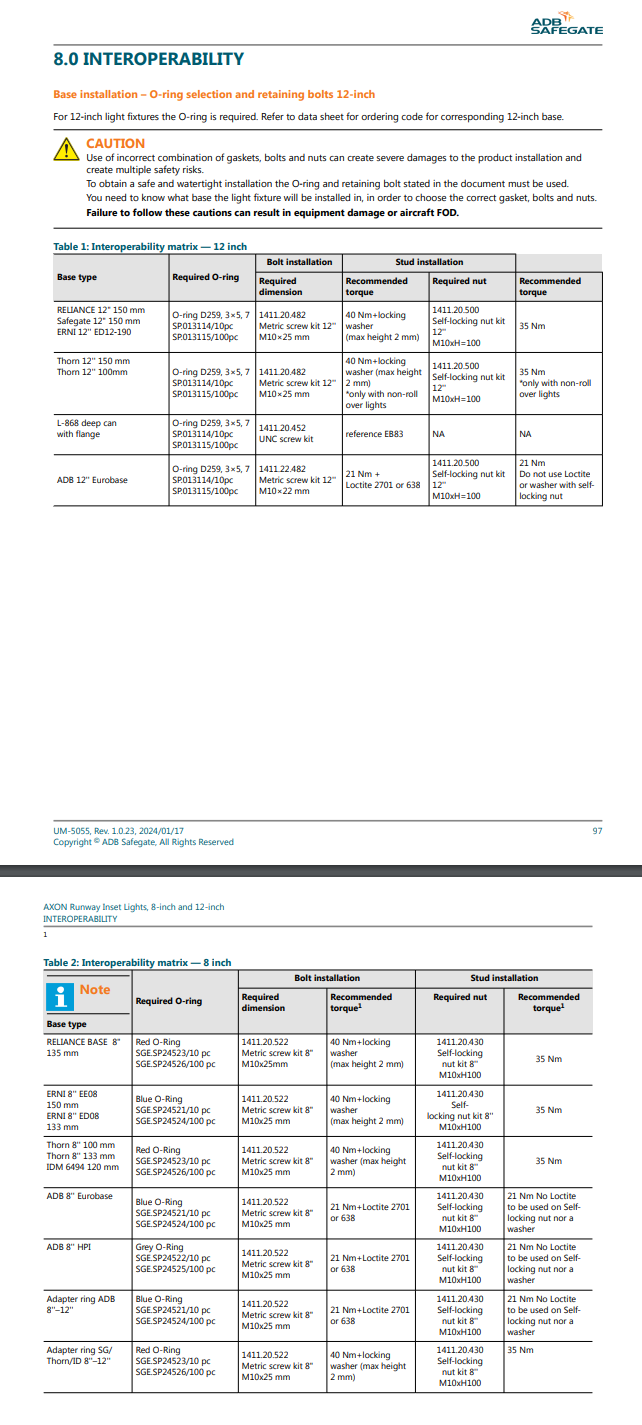
Remark: some ADB Safegate manuals will refer to Reference EB83, you can read about it here: Federal Aviation Administration which is an Engineering Brief (EB) that provides information and guidance for standard methods to be employed when using stainless steel or coated carbon steel bolts to secure light fixtures to L-868 light bases.
In the end, the values depend on if you use loctite, washers, etc., which can vary between airports and the user’s experience.

See the full manual for more details
Go to the fault screen and the password screen and enter FAC1
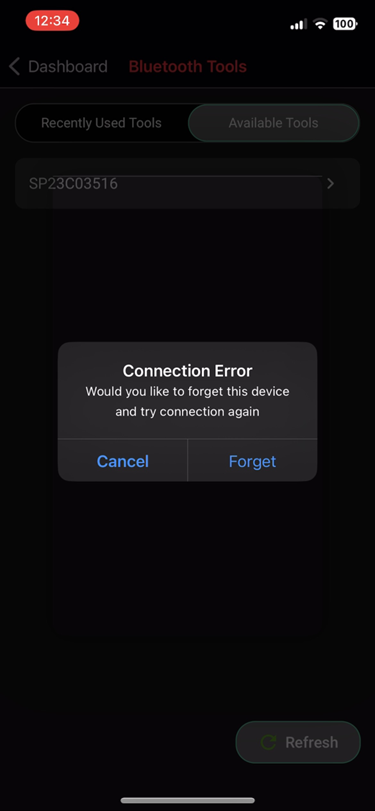
To forget the device:
iPhone’s setting → Bluetooth → choose the wrench → Forget This device
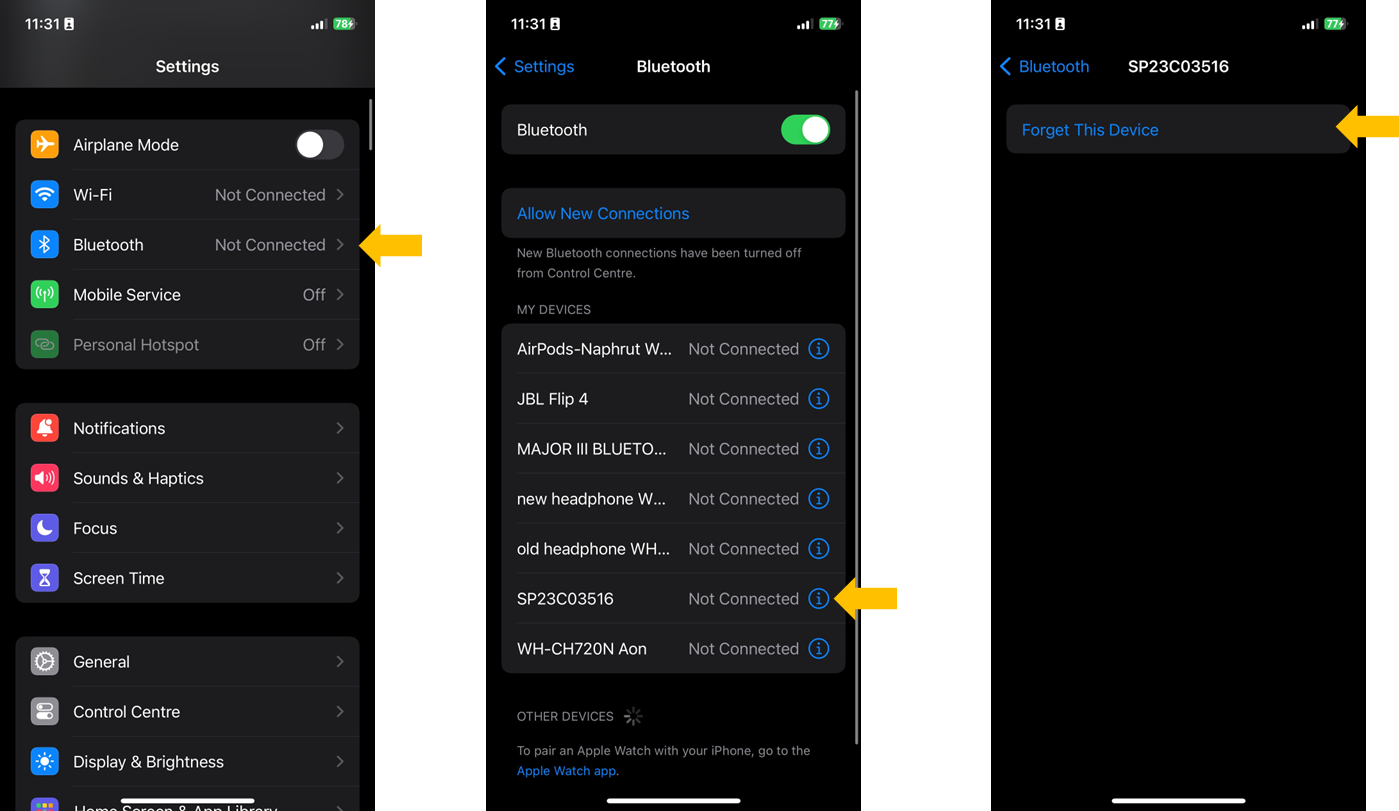
Now you can try to connect the wrench to the INSIGHTConnect app again.